4 Steps to configure CI/CD for website deployed in AWS S3
4 Steps to configure CI/CD with GitHub Actions to deploy changes of the static website to AWS S3
A product engineer focused on building things that scale 7+ years of experience in software engineering Specialized in EHR, EMR, HL7, FHIR APIs Focused on Java, Node, Typescript, and NestJS with an interest in DevOps technologies Specialized in third-party integrations including EHR Systems, EFAX, QuickBooks Online, and Xero
Continuing from our last article regarding the static website deployment using AWS S3, we will be adding additional features of configuring CI/CD for any changes deployment to our website created in AWS S3.
Requirements
You have an AWS Account Created.
You have already followed our last article to create the Static website hosting bucket in AWS S3.
Step 1: Add AWS User for using access keys in GitHub Action and Generating Access Keys
We will be creating a new AWS user solely for using it in the GitHub Action. Since, we require this user to perform action only to the AWS S3, we will be attaching the single policy for S3 access.
Go to the AWS Console, search for IAM, and select it.
From the left side menu, select
Users.
Click on
Create user.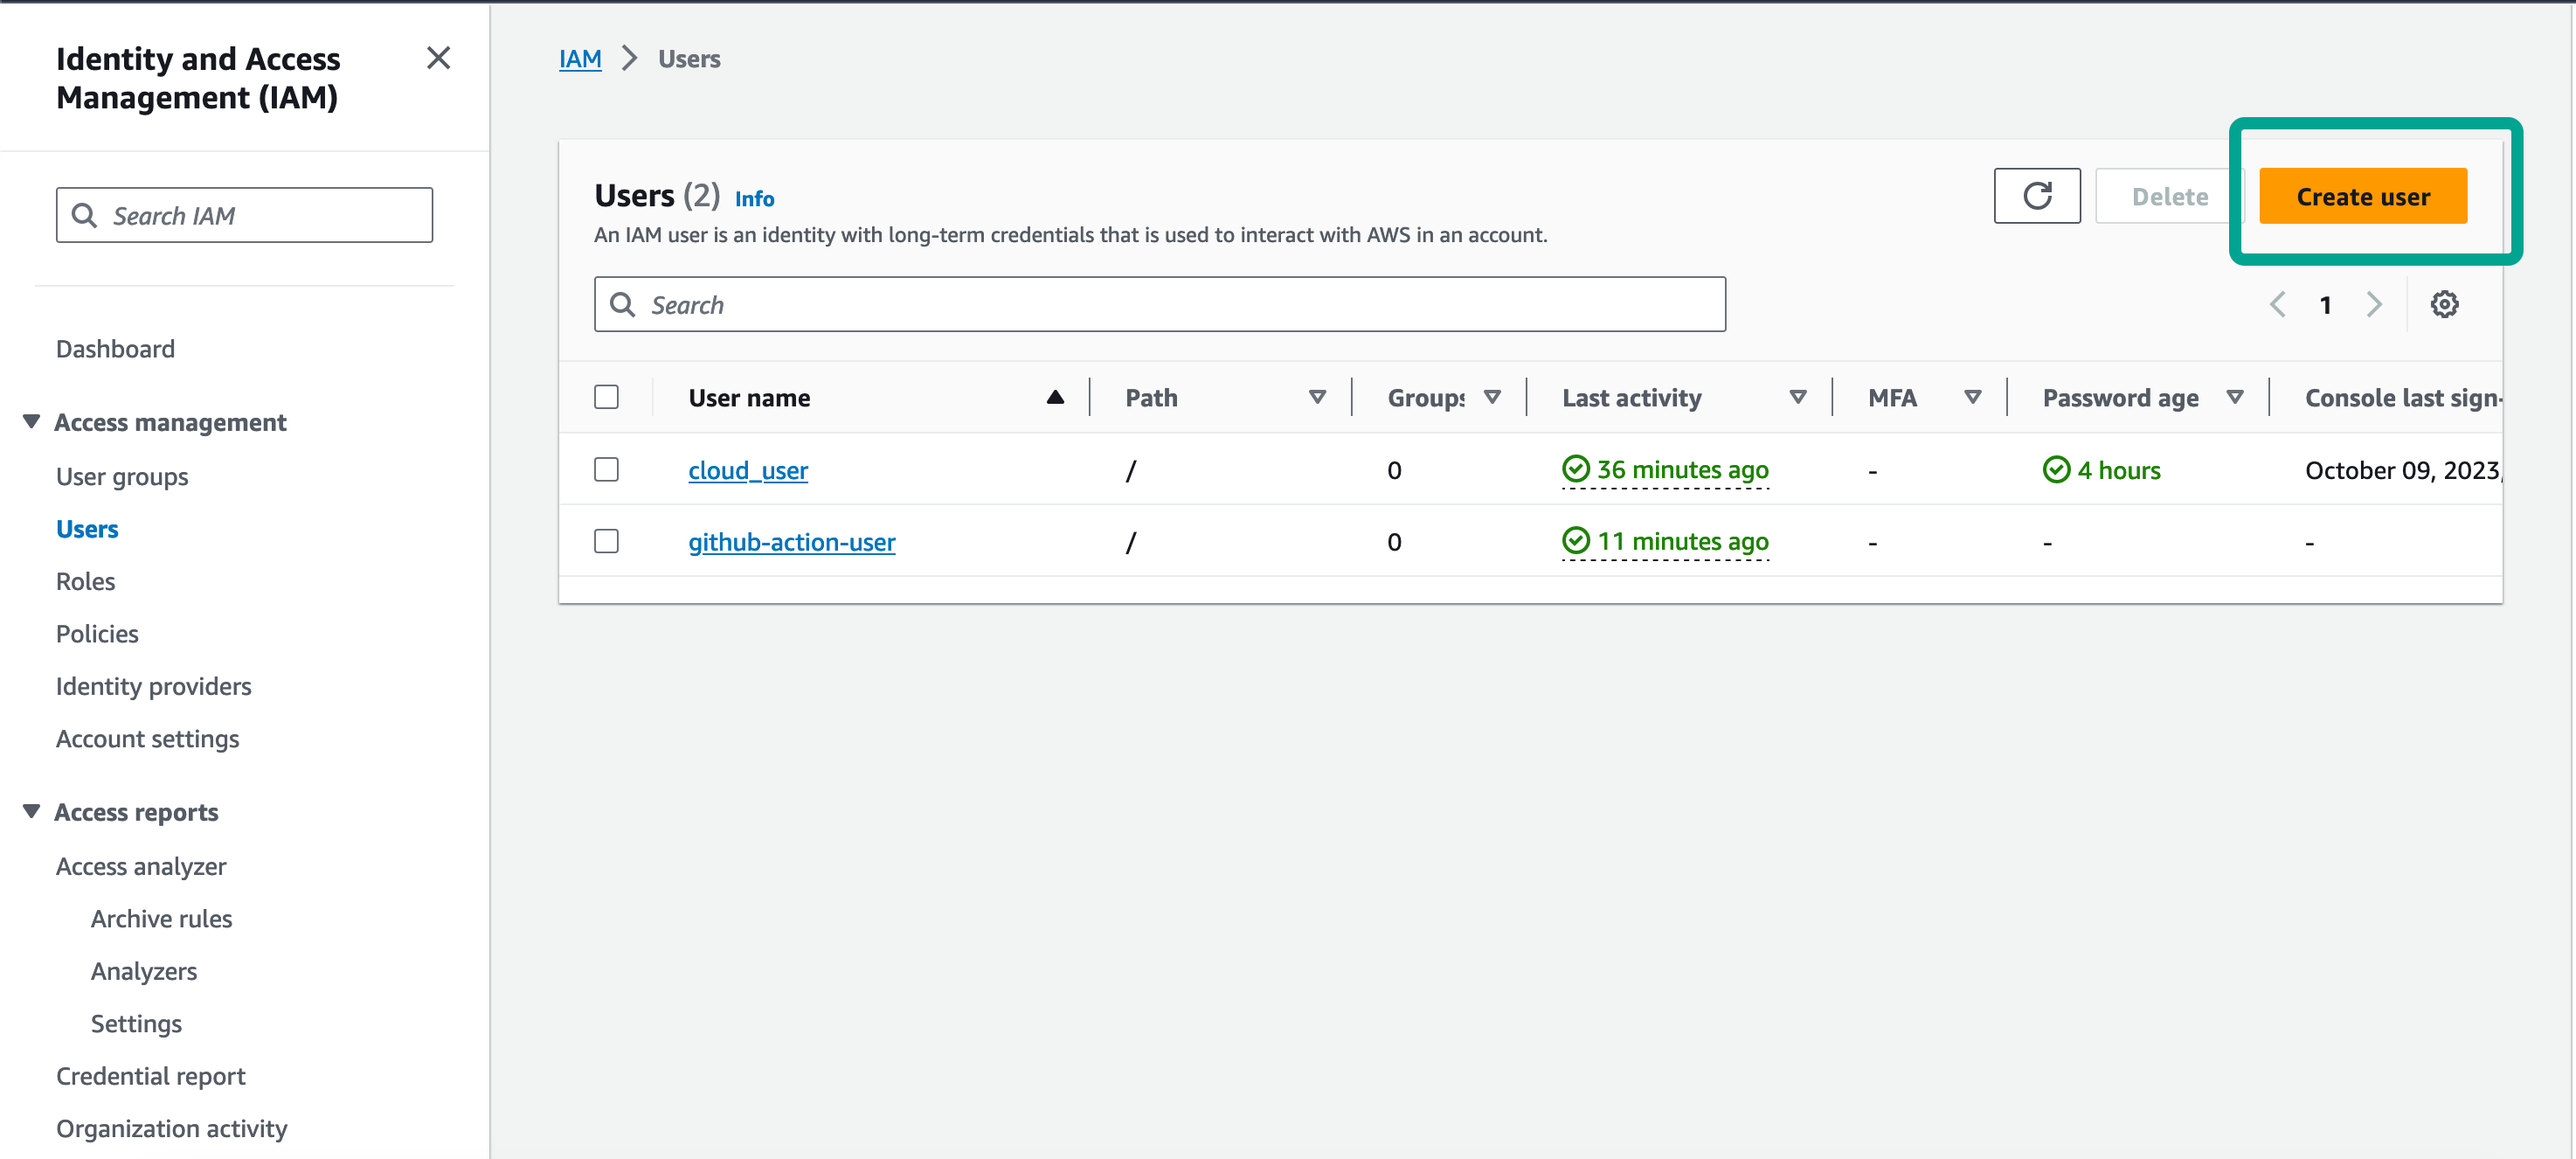
Add the user name in the
User namefield and click onNext.
Select
Attach policies directly, and search fors3in the search bar. SelectAmazonS3FullAccess.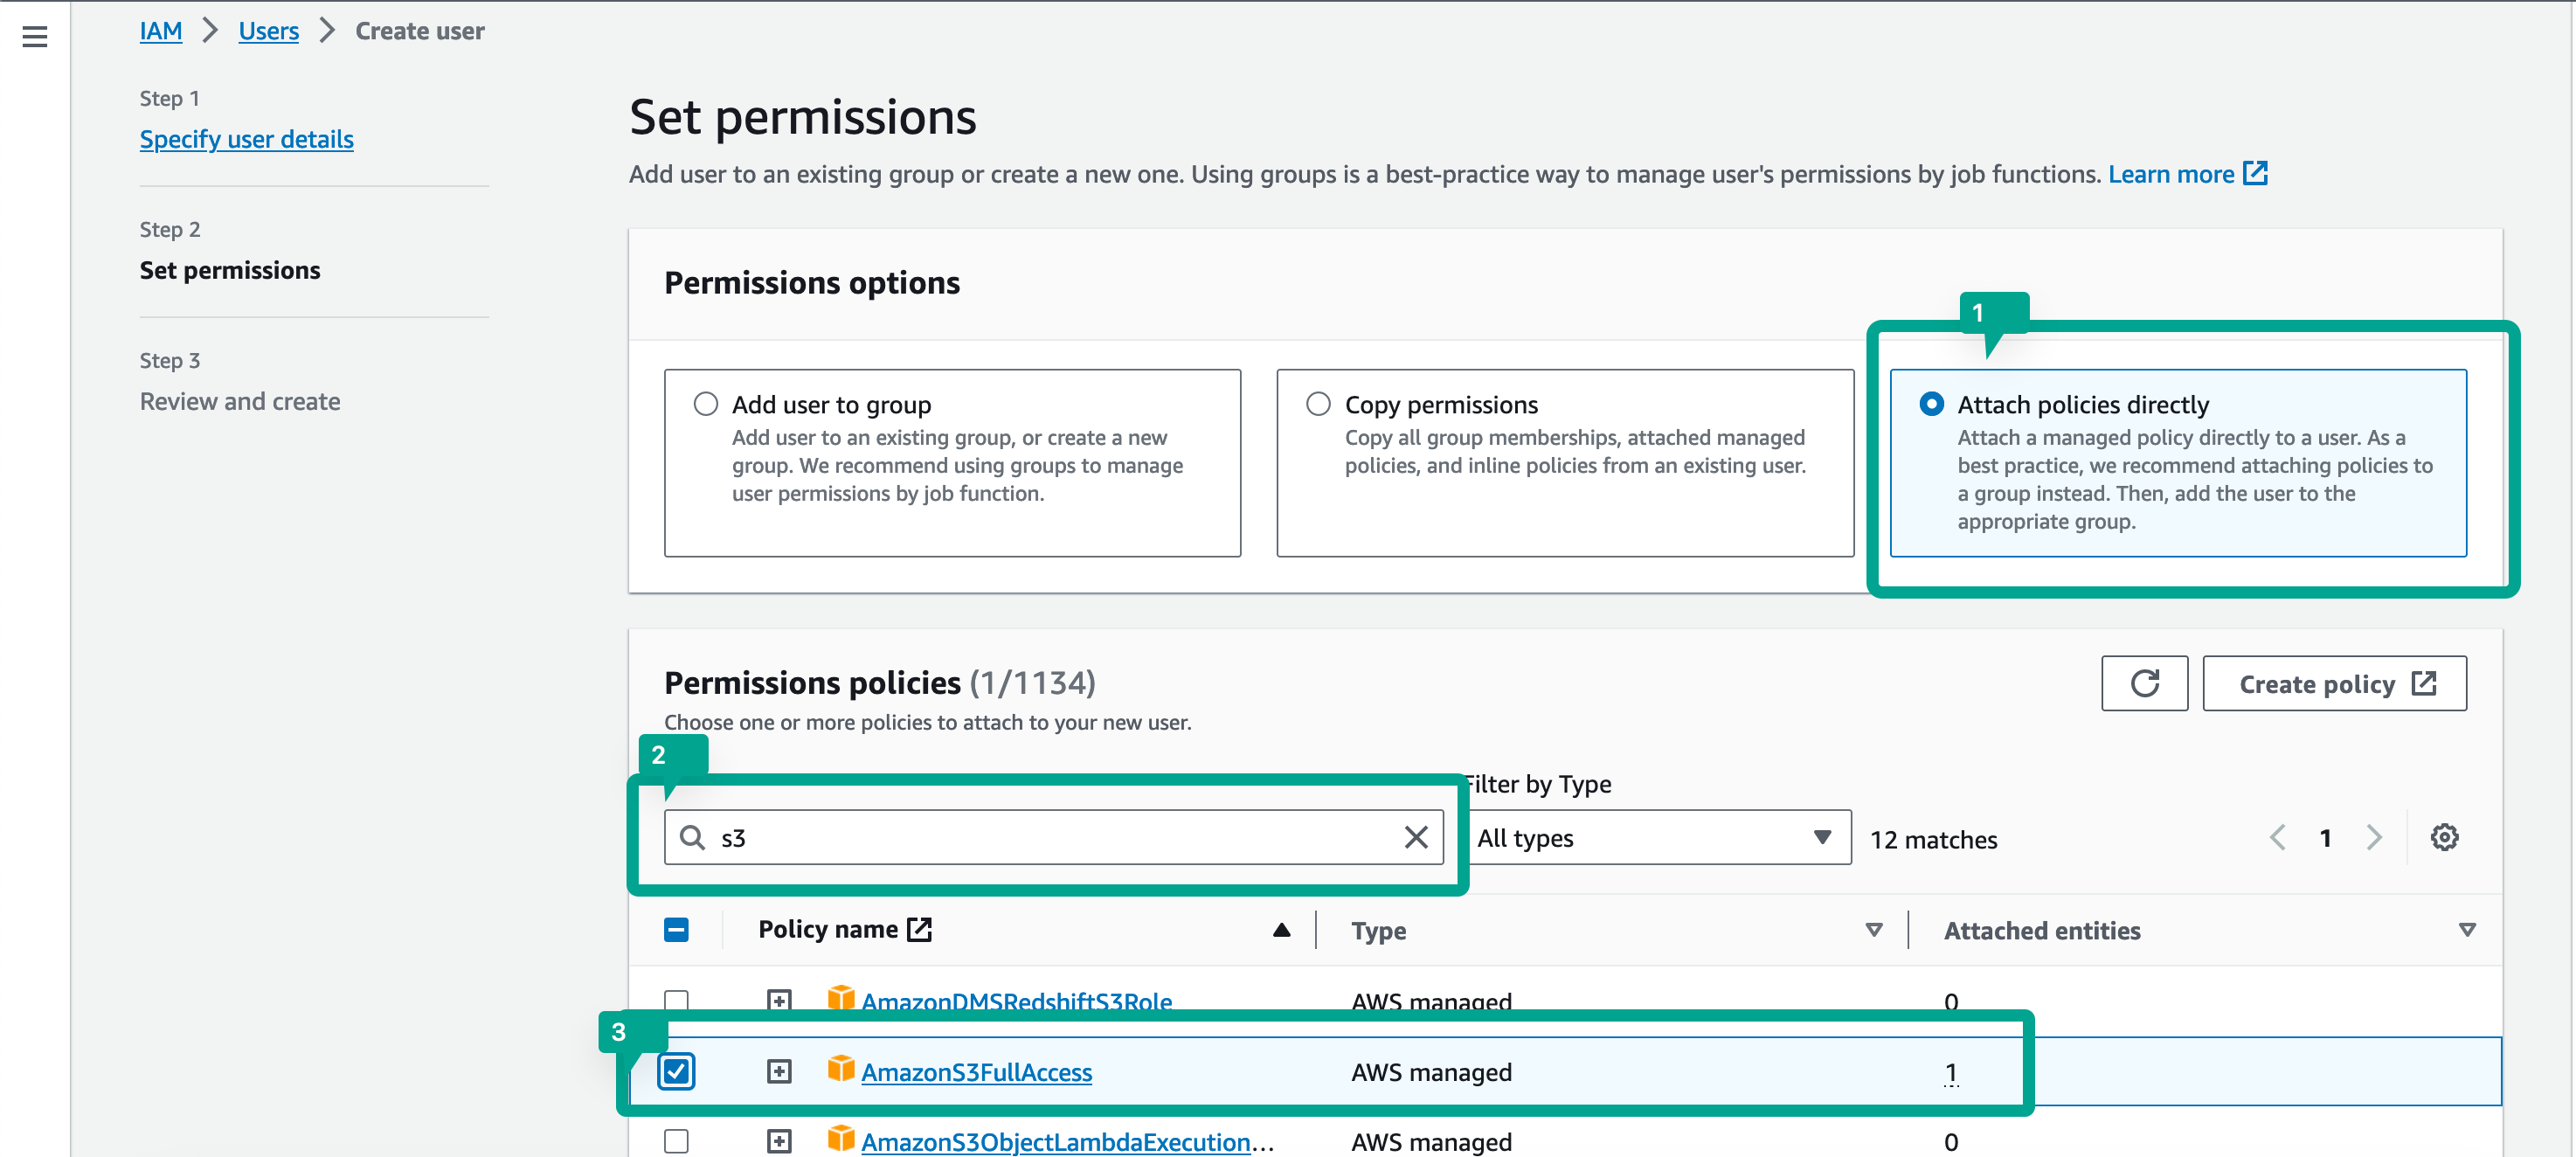
Click
Next.Click on
Create Userto create the user.
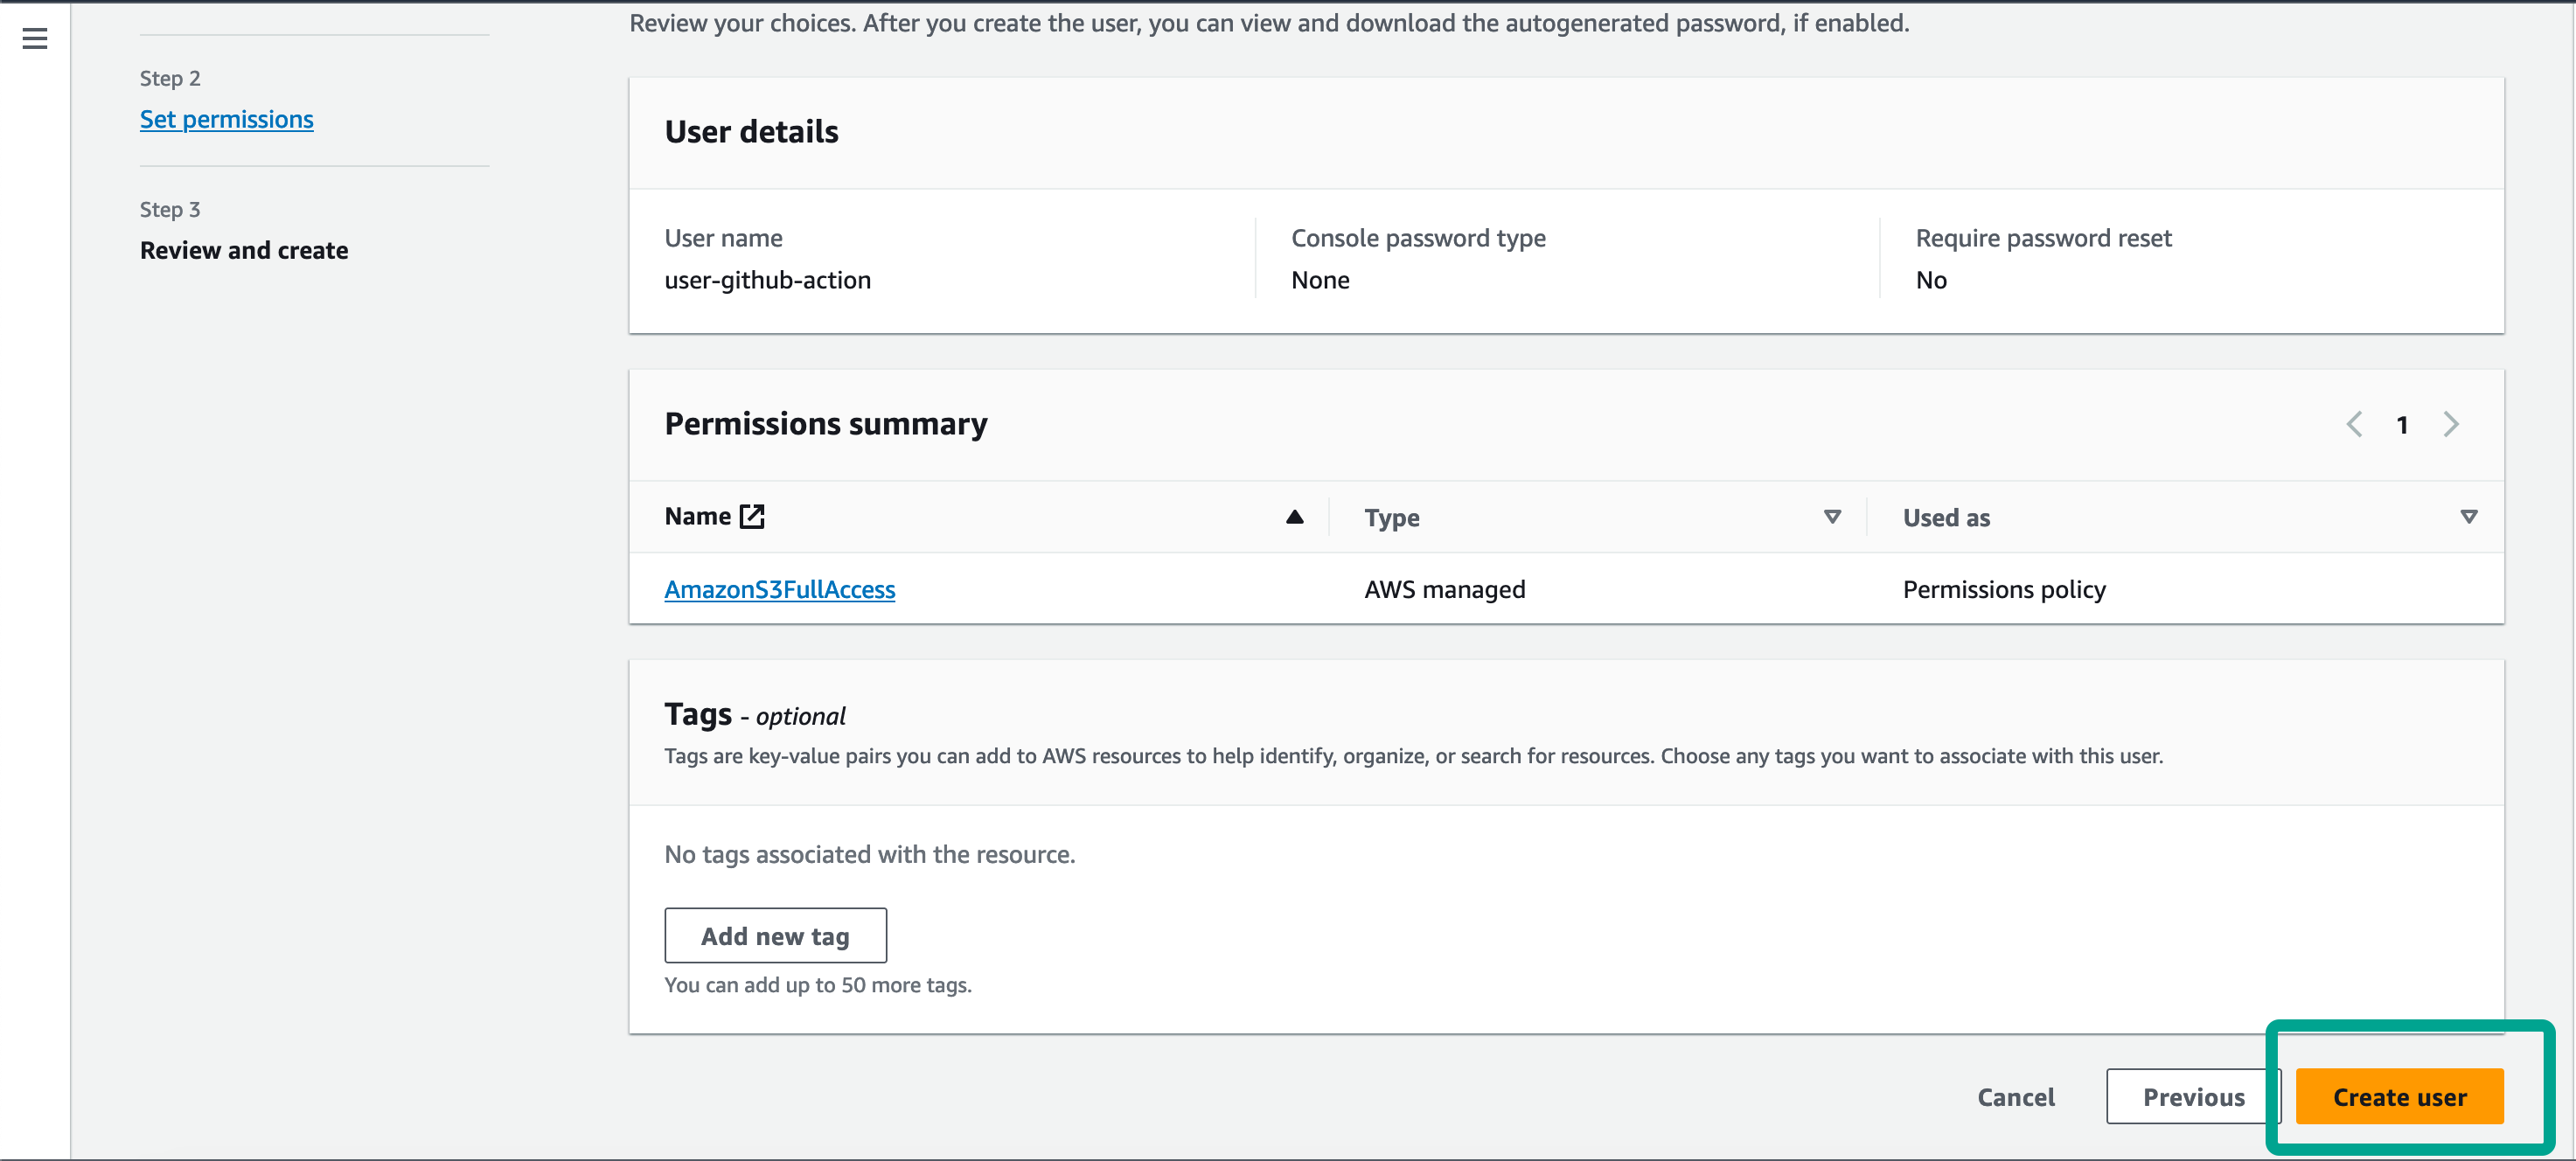
After the user is created, it will appear in the IAM>Users list.

Click on the user you created.
Select
Security Credentialstab.
Move to the
Access keyssection and Click onCreate access key.Select
Command Line Interfacefor use case, and check the Confirmation box, and click onNext.
Click on
Create access key.Download the csv file and click on
Done.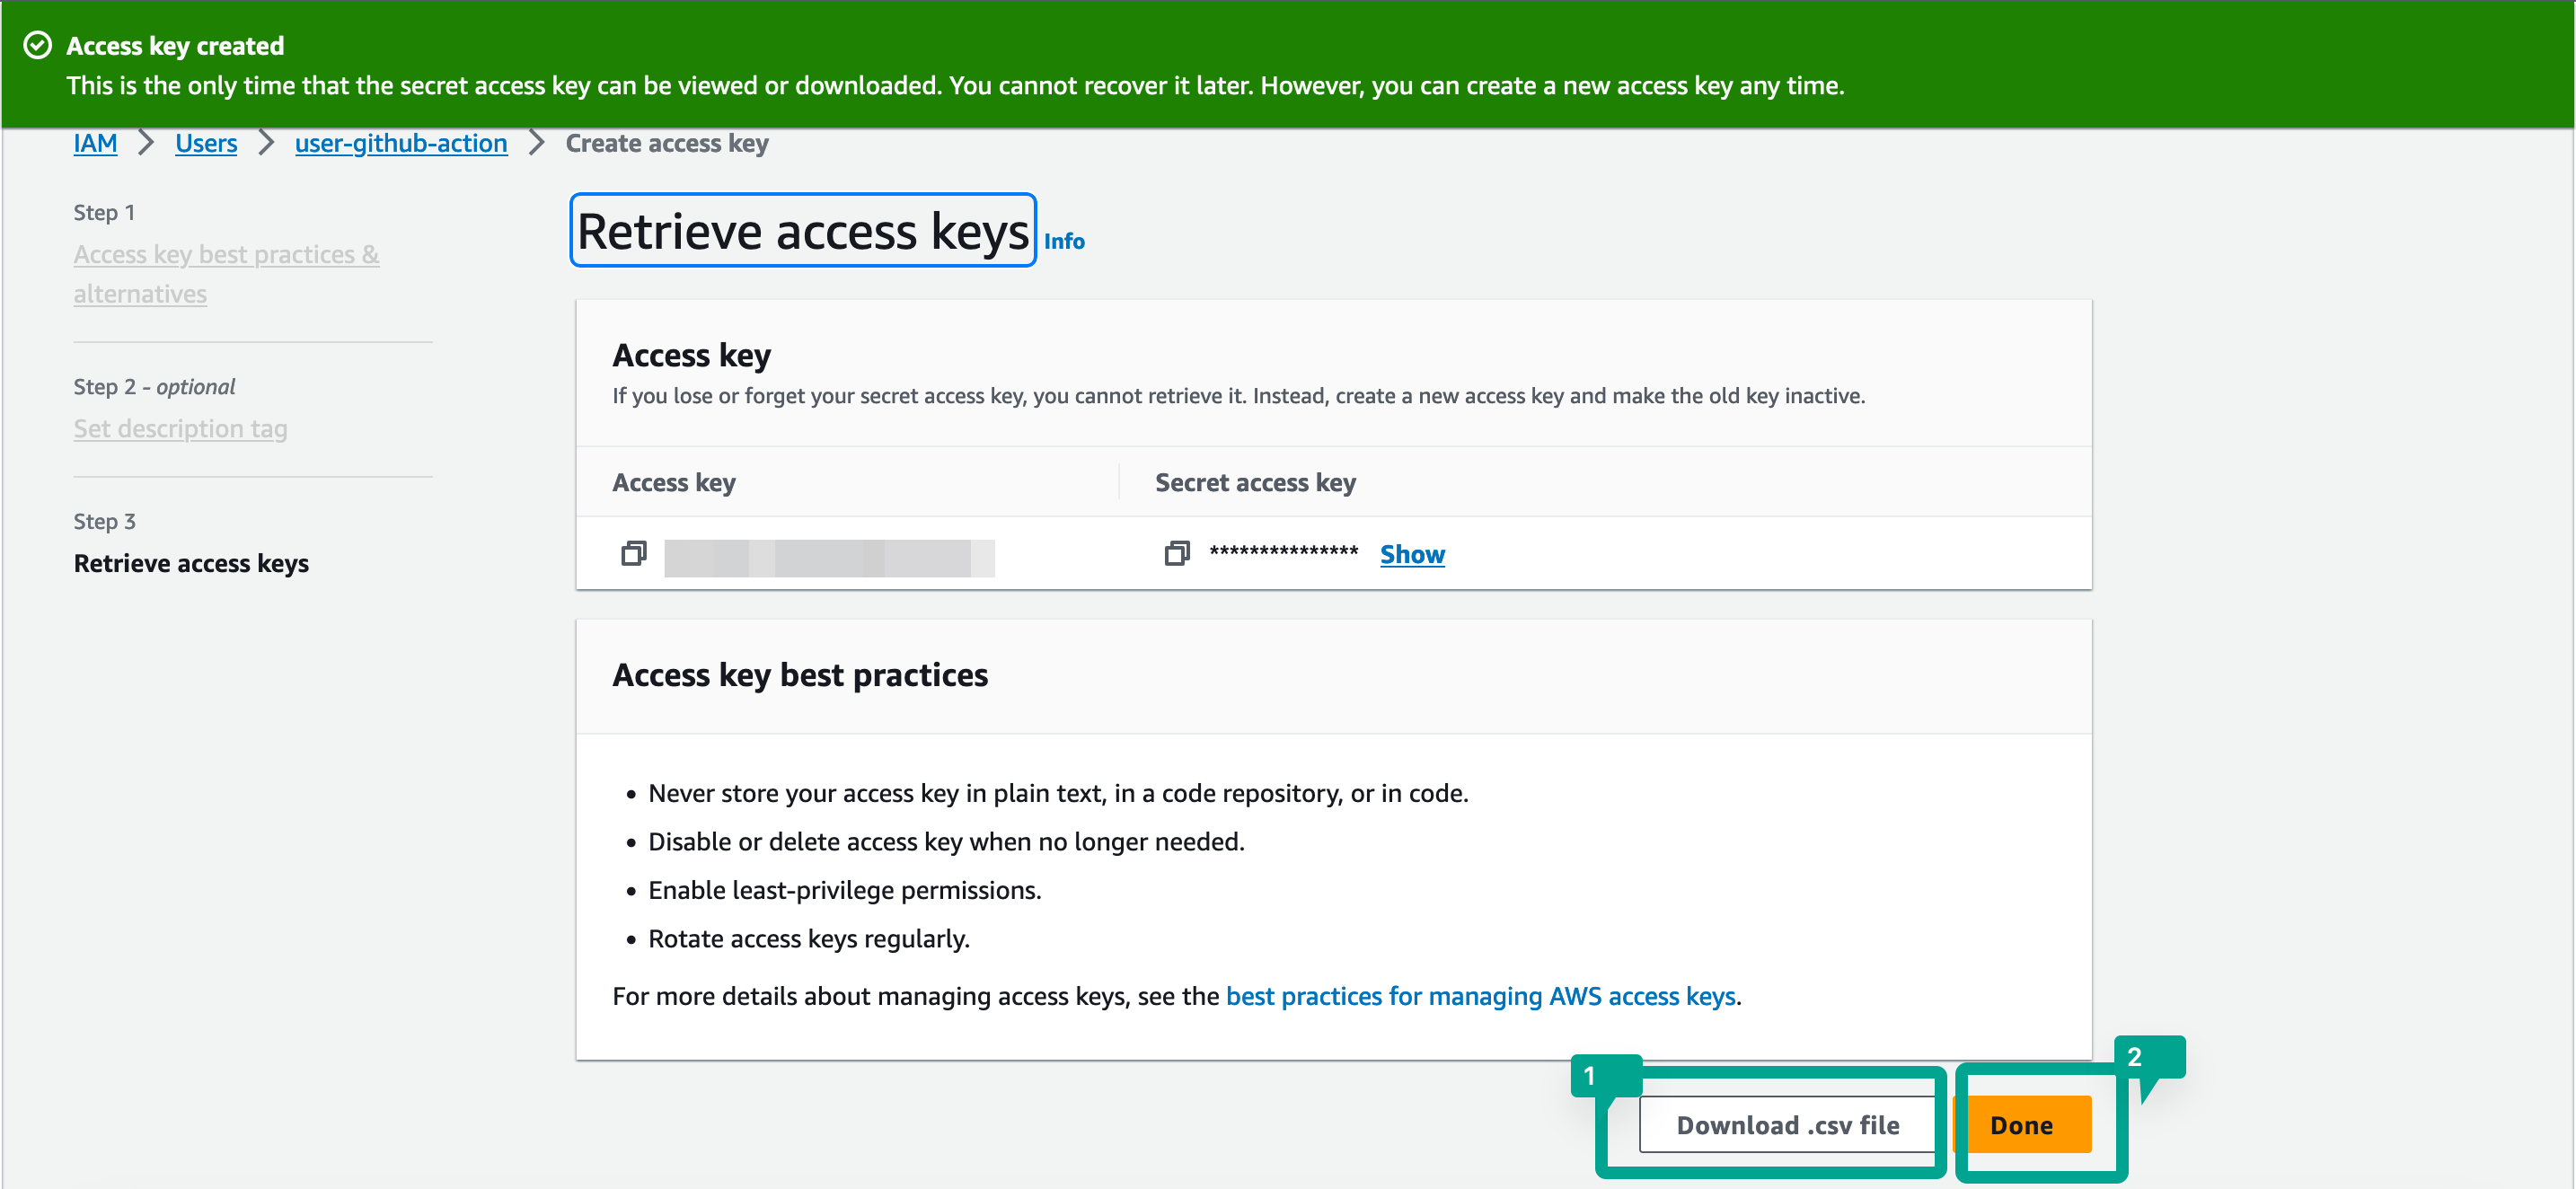
Step 2: Pushing your static website code to the GitHub Repo
I have already created a repository where I have pushed the code for the static website. You can find the repository here.
Step 3: Configuring AWS Secrets in GitHub Repository
Our next step will be to add the AWS credentials to the repository's secret vault.
Go to your GitHub repository.
Select
Settings. From the left side menu, Click onSecrets and Variables. Select Action from the listed menu.
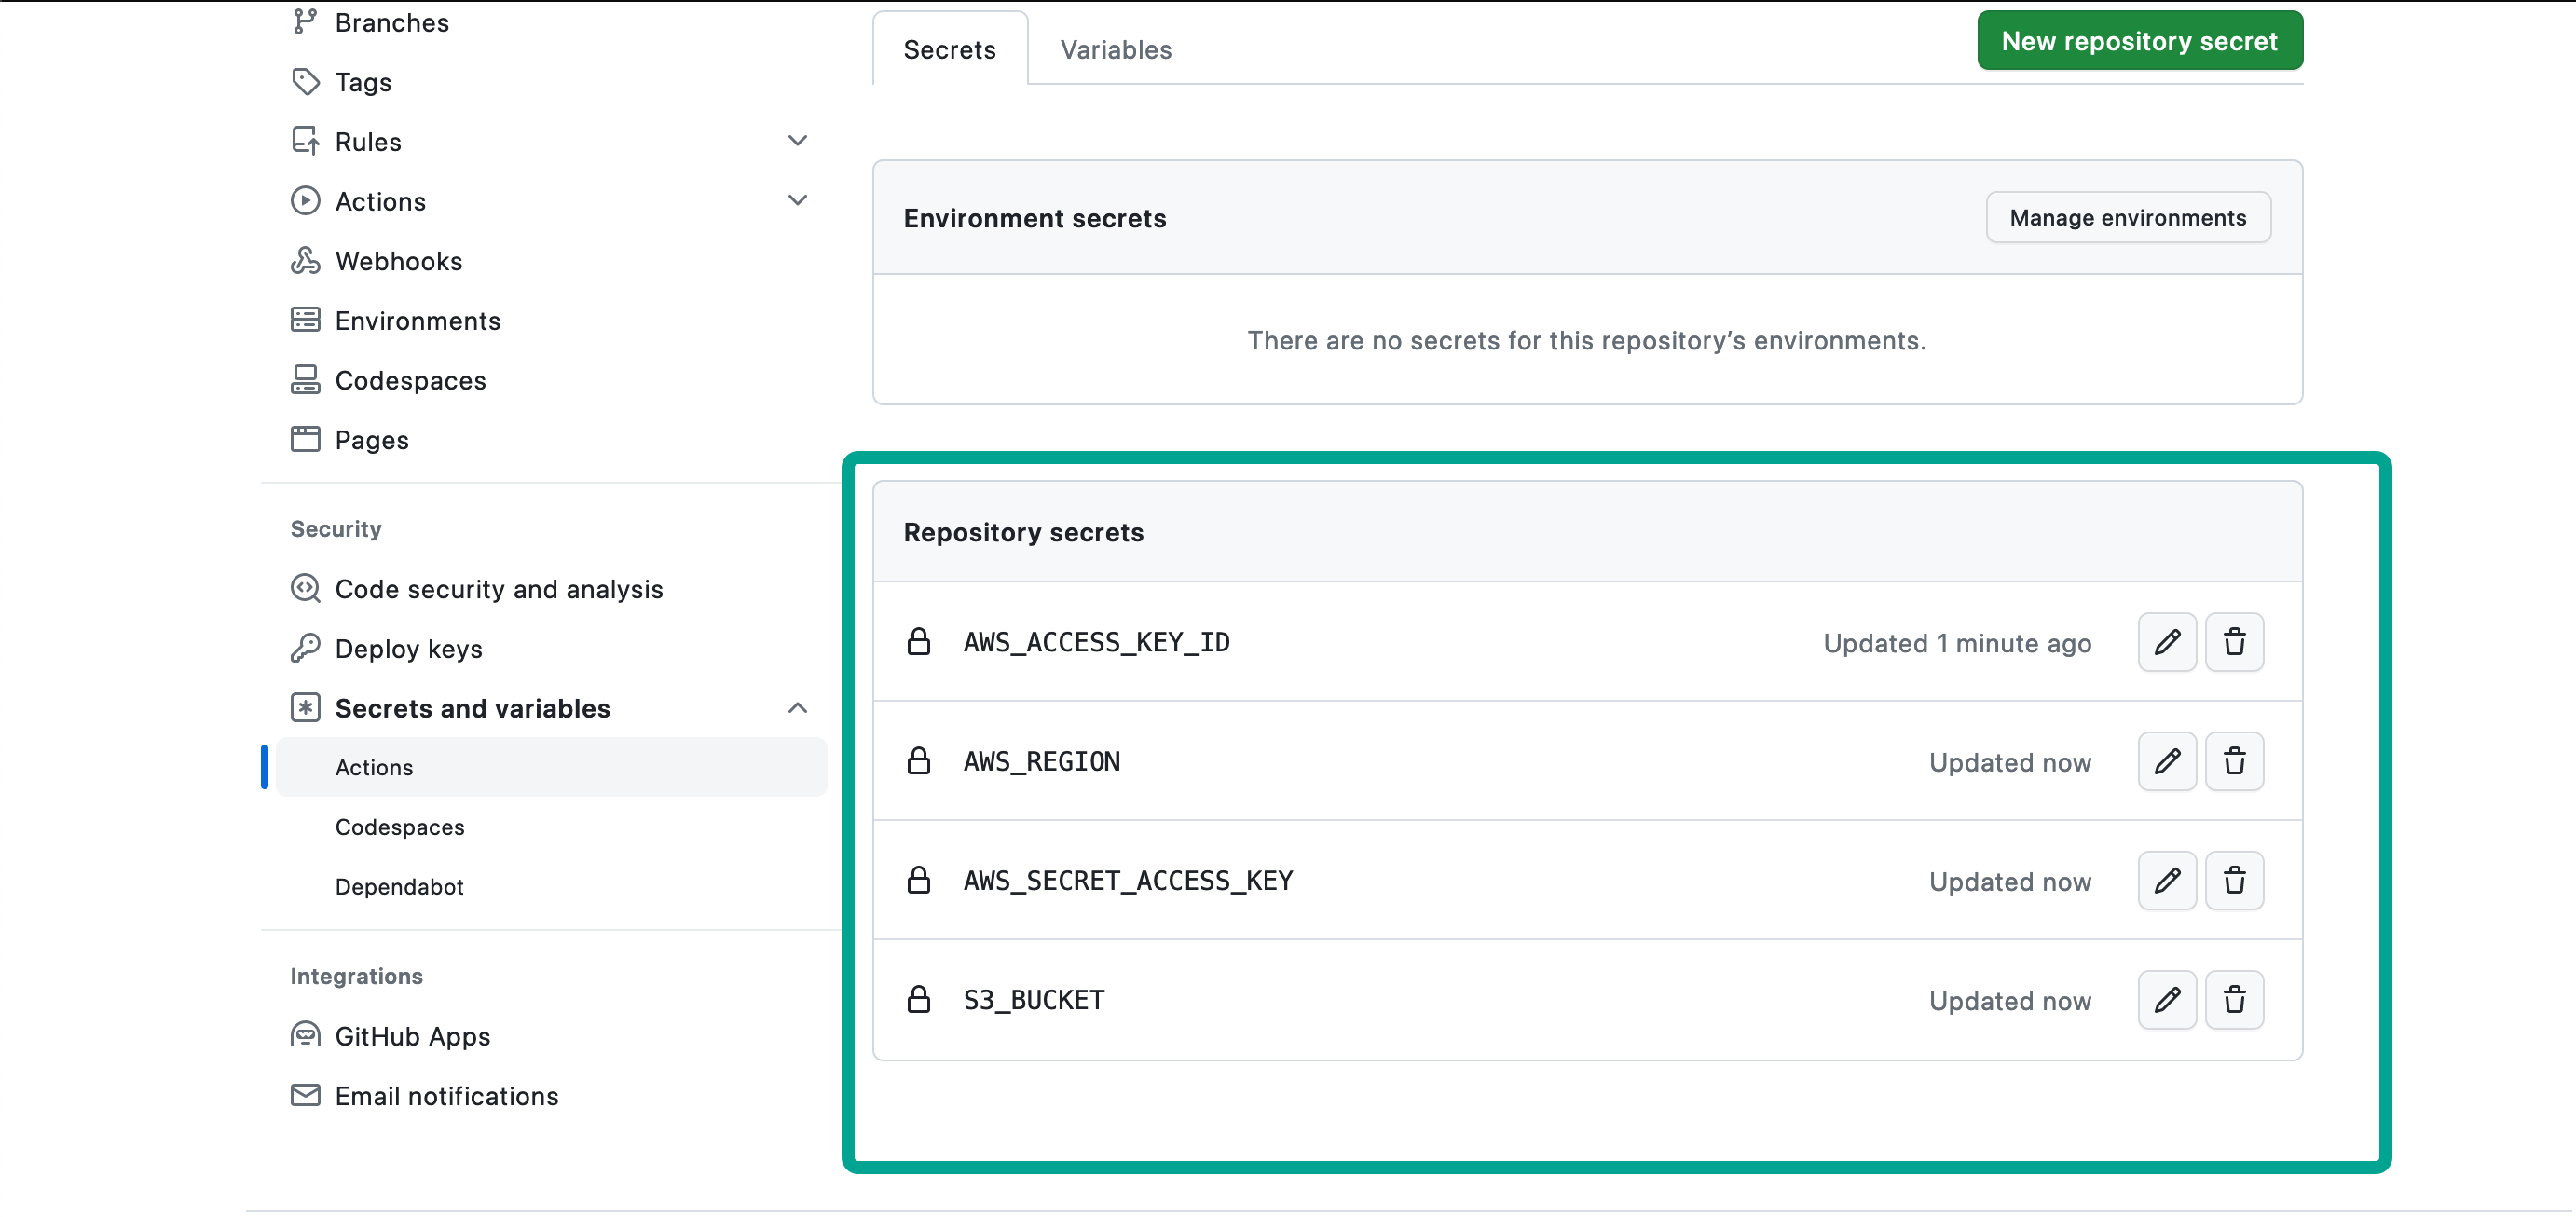
Next, we will be adding the following secrets to our repository:
AWS_ACCESS_KEY_ID
AWS_SECRET_ACCESS_KEY
AWS_REGION
S3_BUCKET
Access key ID, and secret key can be found in the downloaded CSV file that we have from the above step.
AWS region is the region where your S3 bucket is located, and S3 bucket is the name of the bucket where your static site is deployed.
Once you have added the secrets, it should look like this.
Step 4: GitHub Action
Our next step is to write the GitHub action which will be triggered when we push any changes to the master branch. Once the changes are pushed to the master branch, it should push the changes to the AWS S3 and should be reflected on our website.
Create a folder named
.githubin the root directory of your project.Create another new folder inside
.githubfolder namedworkflowswhere our workflow will be stored.Create a new file named
deploy.ymlinside theworkflowsdirectory.Add the following content to the
deploy.ymlfile.
name: Deploy static website to S3
on:
  push:
    branches:
      - master
jobs:
  upload:
    runs-on: ubuntu-latest
    steps:
      - name: Checkout code
        uses: actions/checkout@v2
      - name: Configure AWS Credentials
        uses: aws-actions/configure-aws-credentials@v1
        with:
          aws-access-key-id: ${{ secrets.AWS_ACCESS_KEY_ID }}
          aws-secret-access-key: ${{ secrets.AWS_SECRET_ACCESS_KEY }}
          aws-region: ${{ secrets.AWS_REGION }}
      - name: Upload code to S3
        run: aws s3 sync src s3://${{secrets.S3_BUCKET}}
Here's a simple explanation of the workflow.
We are creating a workflow that gets triggered whenever new changes are pushed to the master branch.
We have one job in the workflow named
uploadwhich does the following actions.It checks out the code in the first step.
It configures the AWS Credentials using the community-developed GitHub action.
It uploads our code using the command
aws s3 sync src s3://${{secrets.S3_BUCKET}}
We are usingaws s3 sync NAME_OF_FOLDER s3://BUCKET-NAMEto sync our folder namedsrc.
Changesrcto your folder name which stores all static content files. If it's a root directory, just use.instead of thesrc.
Now, whenever you make any changes to your code, and is pushed to master branch, it will get auto-deployed and changes can be seen and reflected on your website.
Thank you for reading this article. Hope you learned something from it and can use it in real life. 🎉🎉🎉