5 Easy Steps to Deploy Static Website to AWS S3

A product engineer focused on building things that scale 7+ years of experience in software engineering Specialized in EHR, EMR, HL7, FHIR APIs Focused on Java, Node, Typescript, and NestJS with an interest in DevOps technologies Specialized in third-party integrations including EHR Systems, EFAX, QuickBooks Online, and Xero
Requirements
To follow this guide, you will be required to have:
AWS Account
Static Site Template or your custom HTML
Step 1: Creating a bucket
To create a bucket in AWS S3, follow these steps:
Go to your AWS Console.
Search S3 and Select it from the search bar.
Click on
Create bucket.

It will open up a new window where you will be required to fill up the bucket information.
Add bucket name. It should be the name of your website.
eg.buysoundbar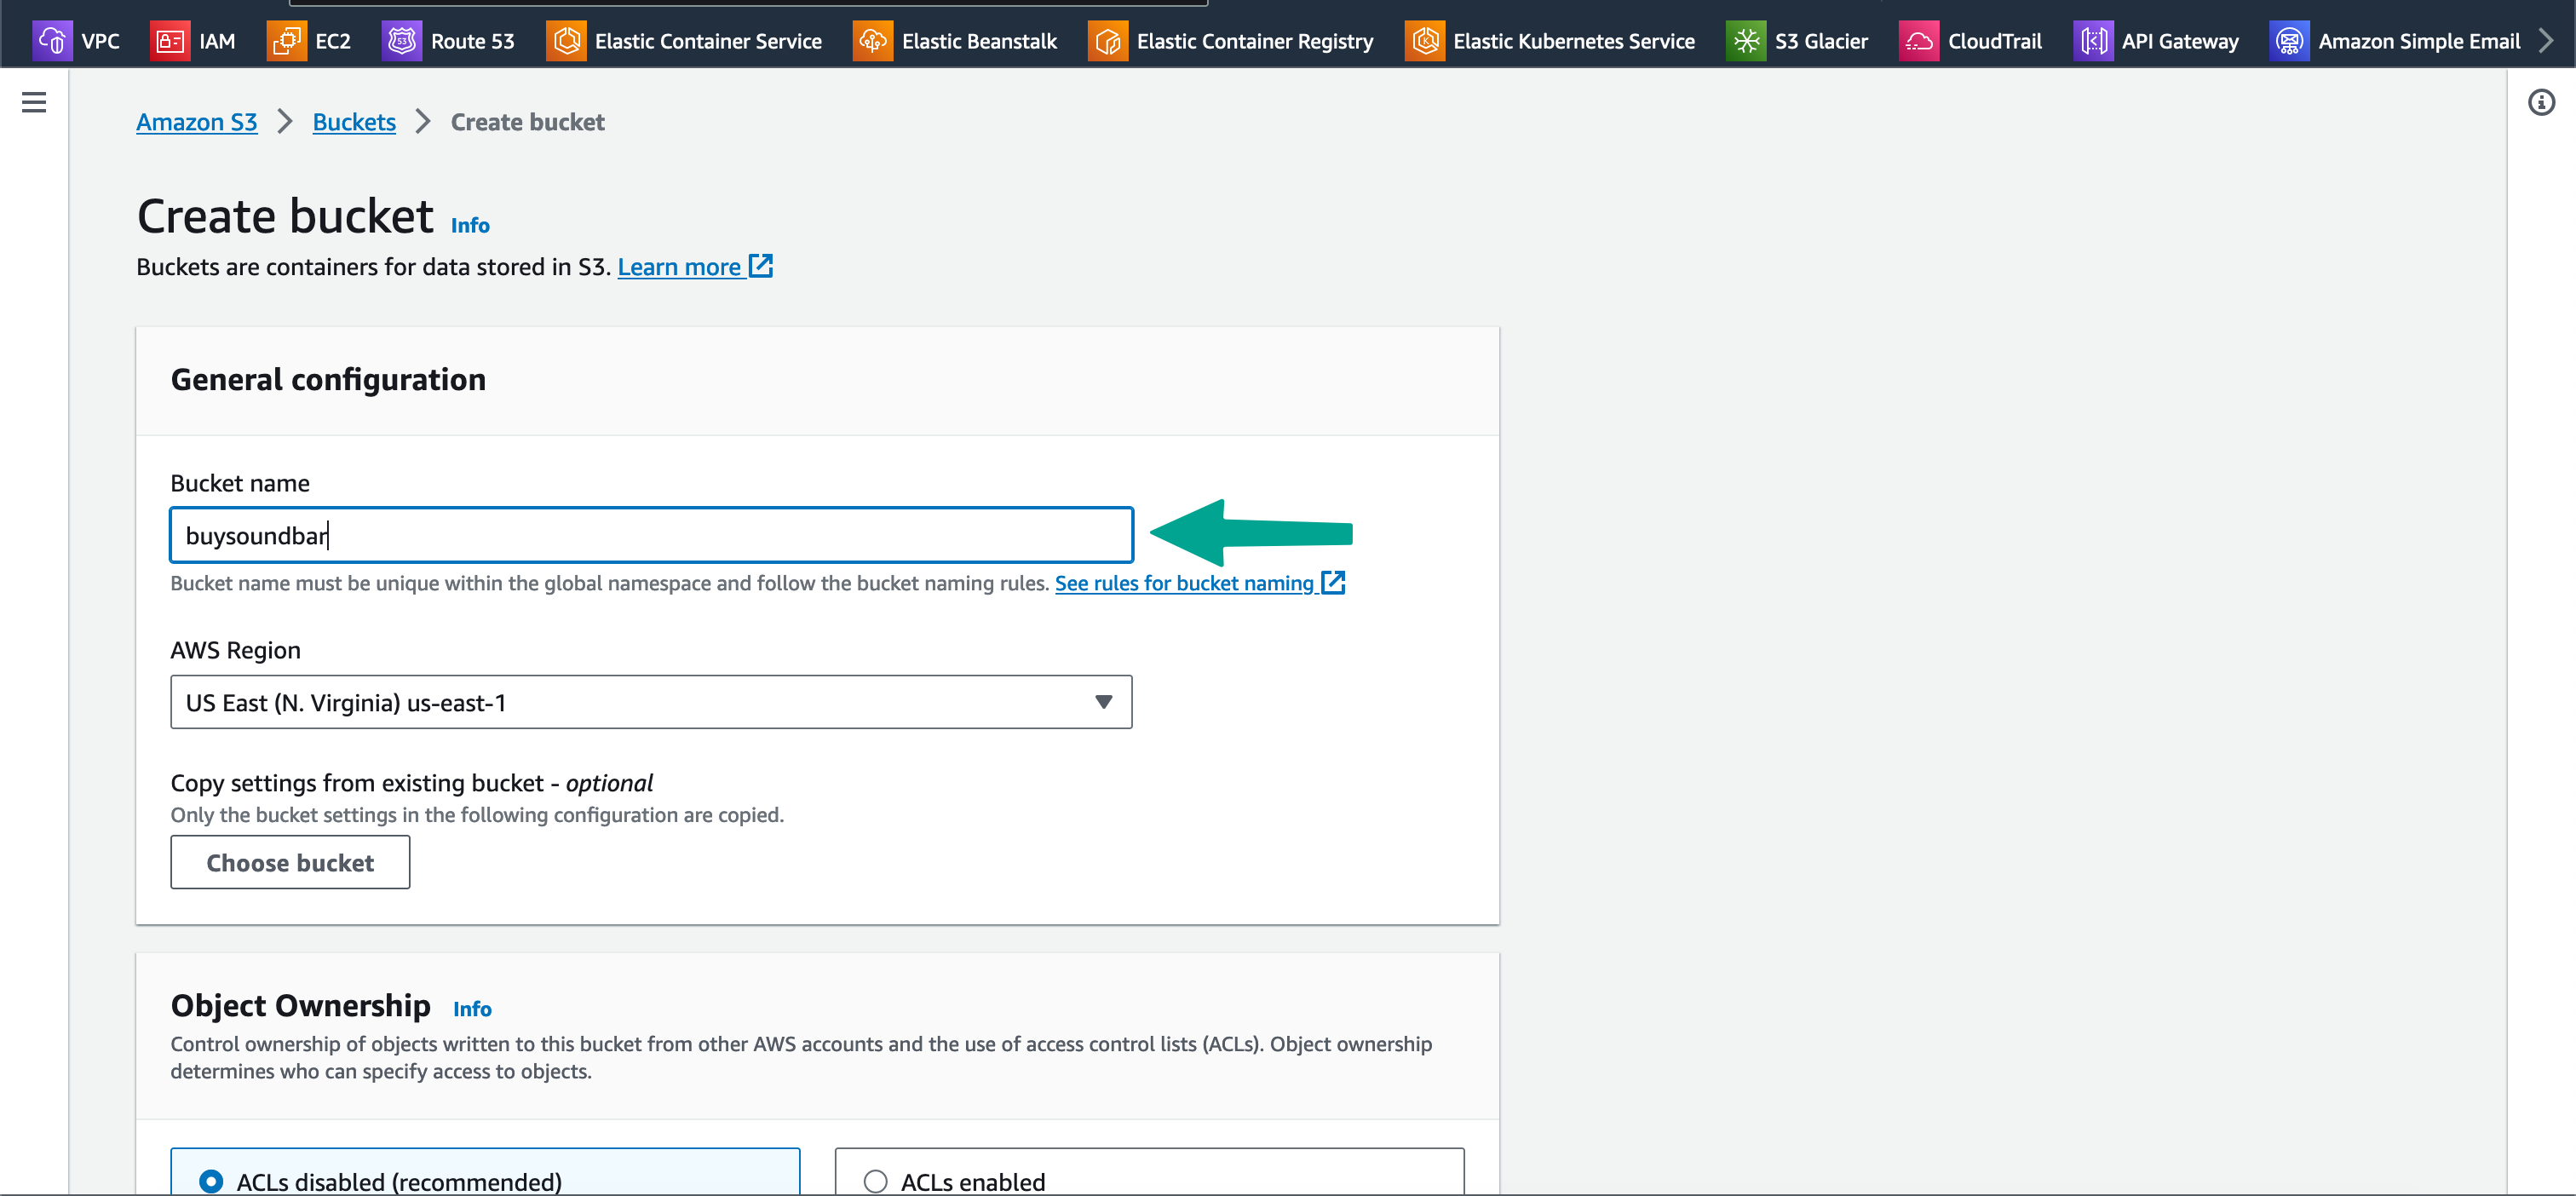
Skip all the settings to default and at the bottom, click on
Create bucketto create your bucket.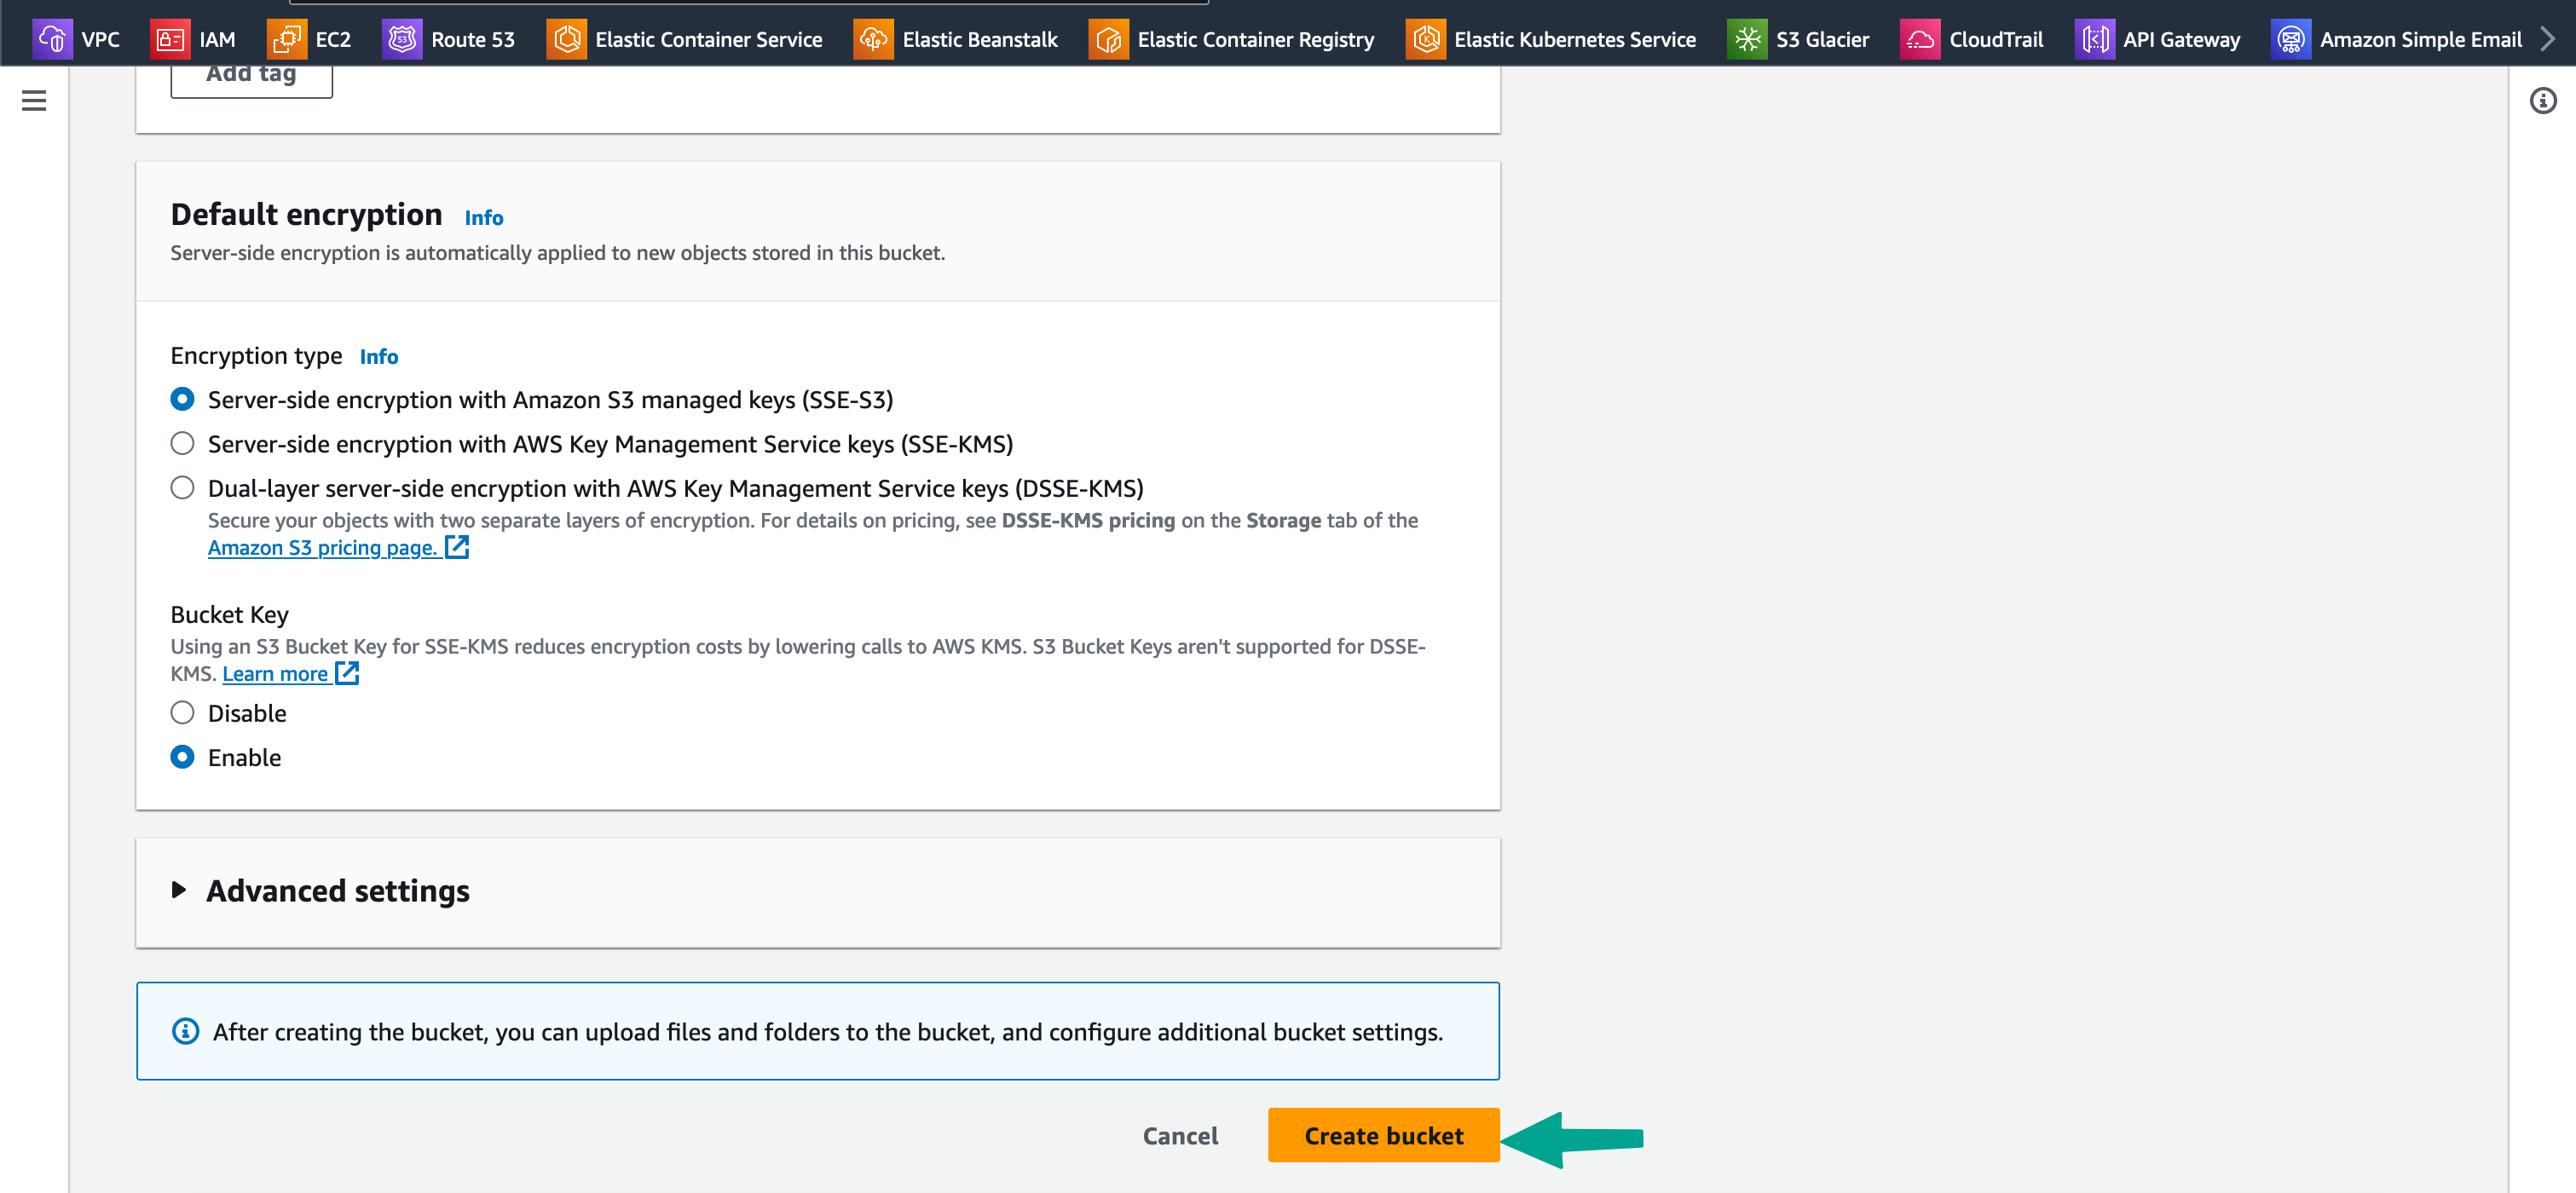
Once the bucket is created, a pop-up message will be shown and you will be redirected to the bucket list page.

Step 2: Making bucket public
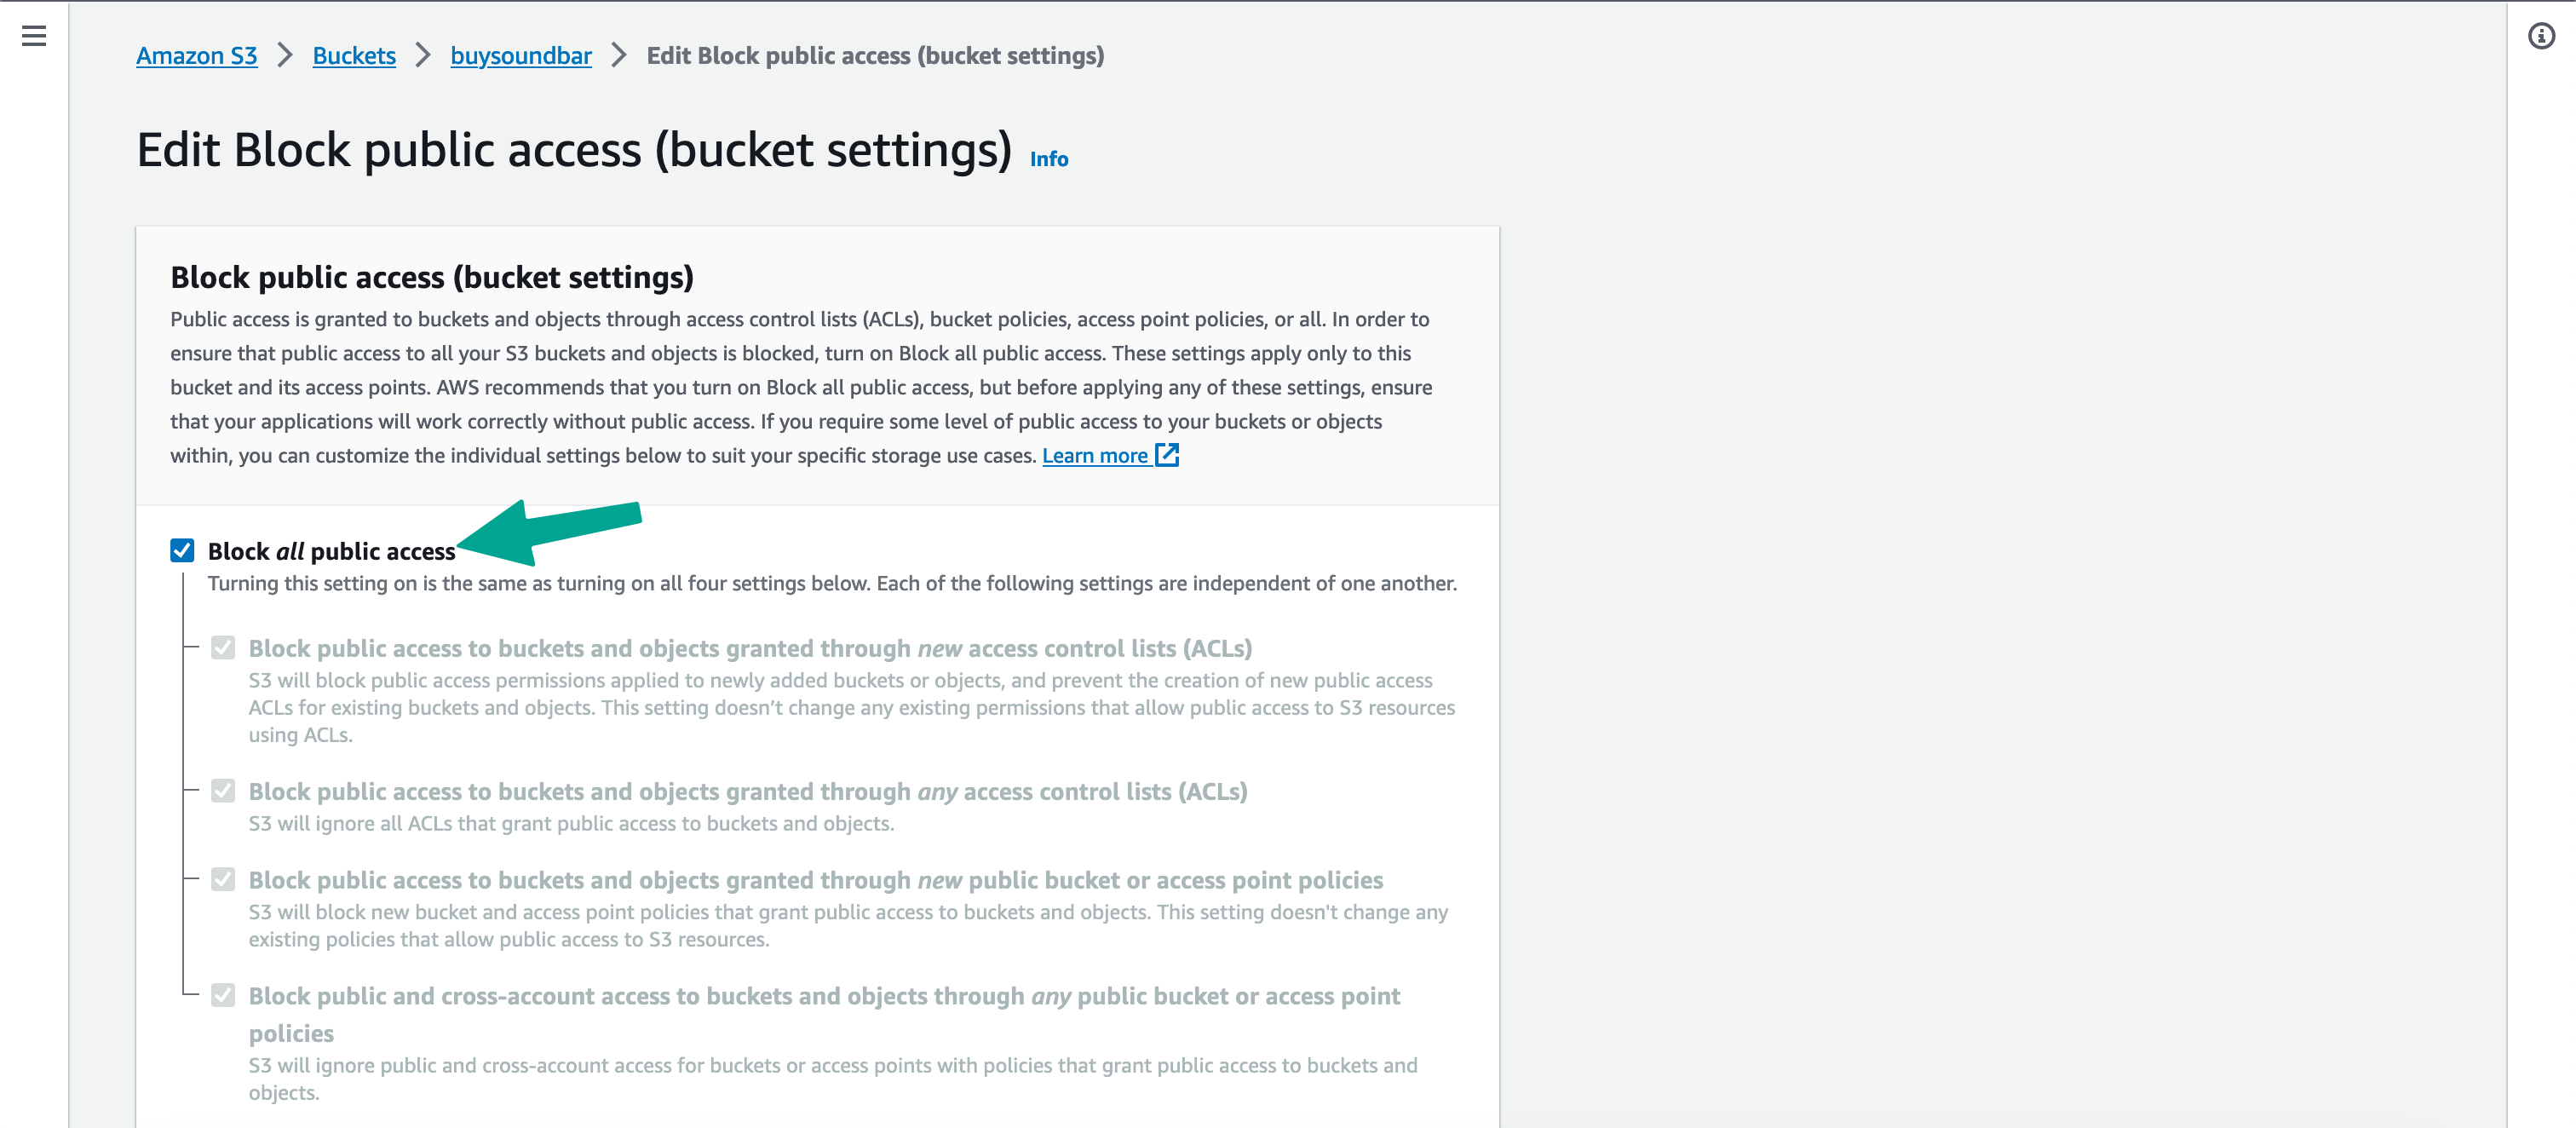
By default, Block public access is on for each new bucket. Bucket should be made public before hosting any static website on it.
Select your bucket from the list.
Select
Permissionstab.

On the
Block public accessblock, click onEditto update the public access.
De-select the checkbox for public access.
Click on
Save changesto save the settings.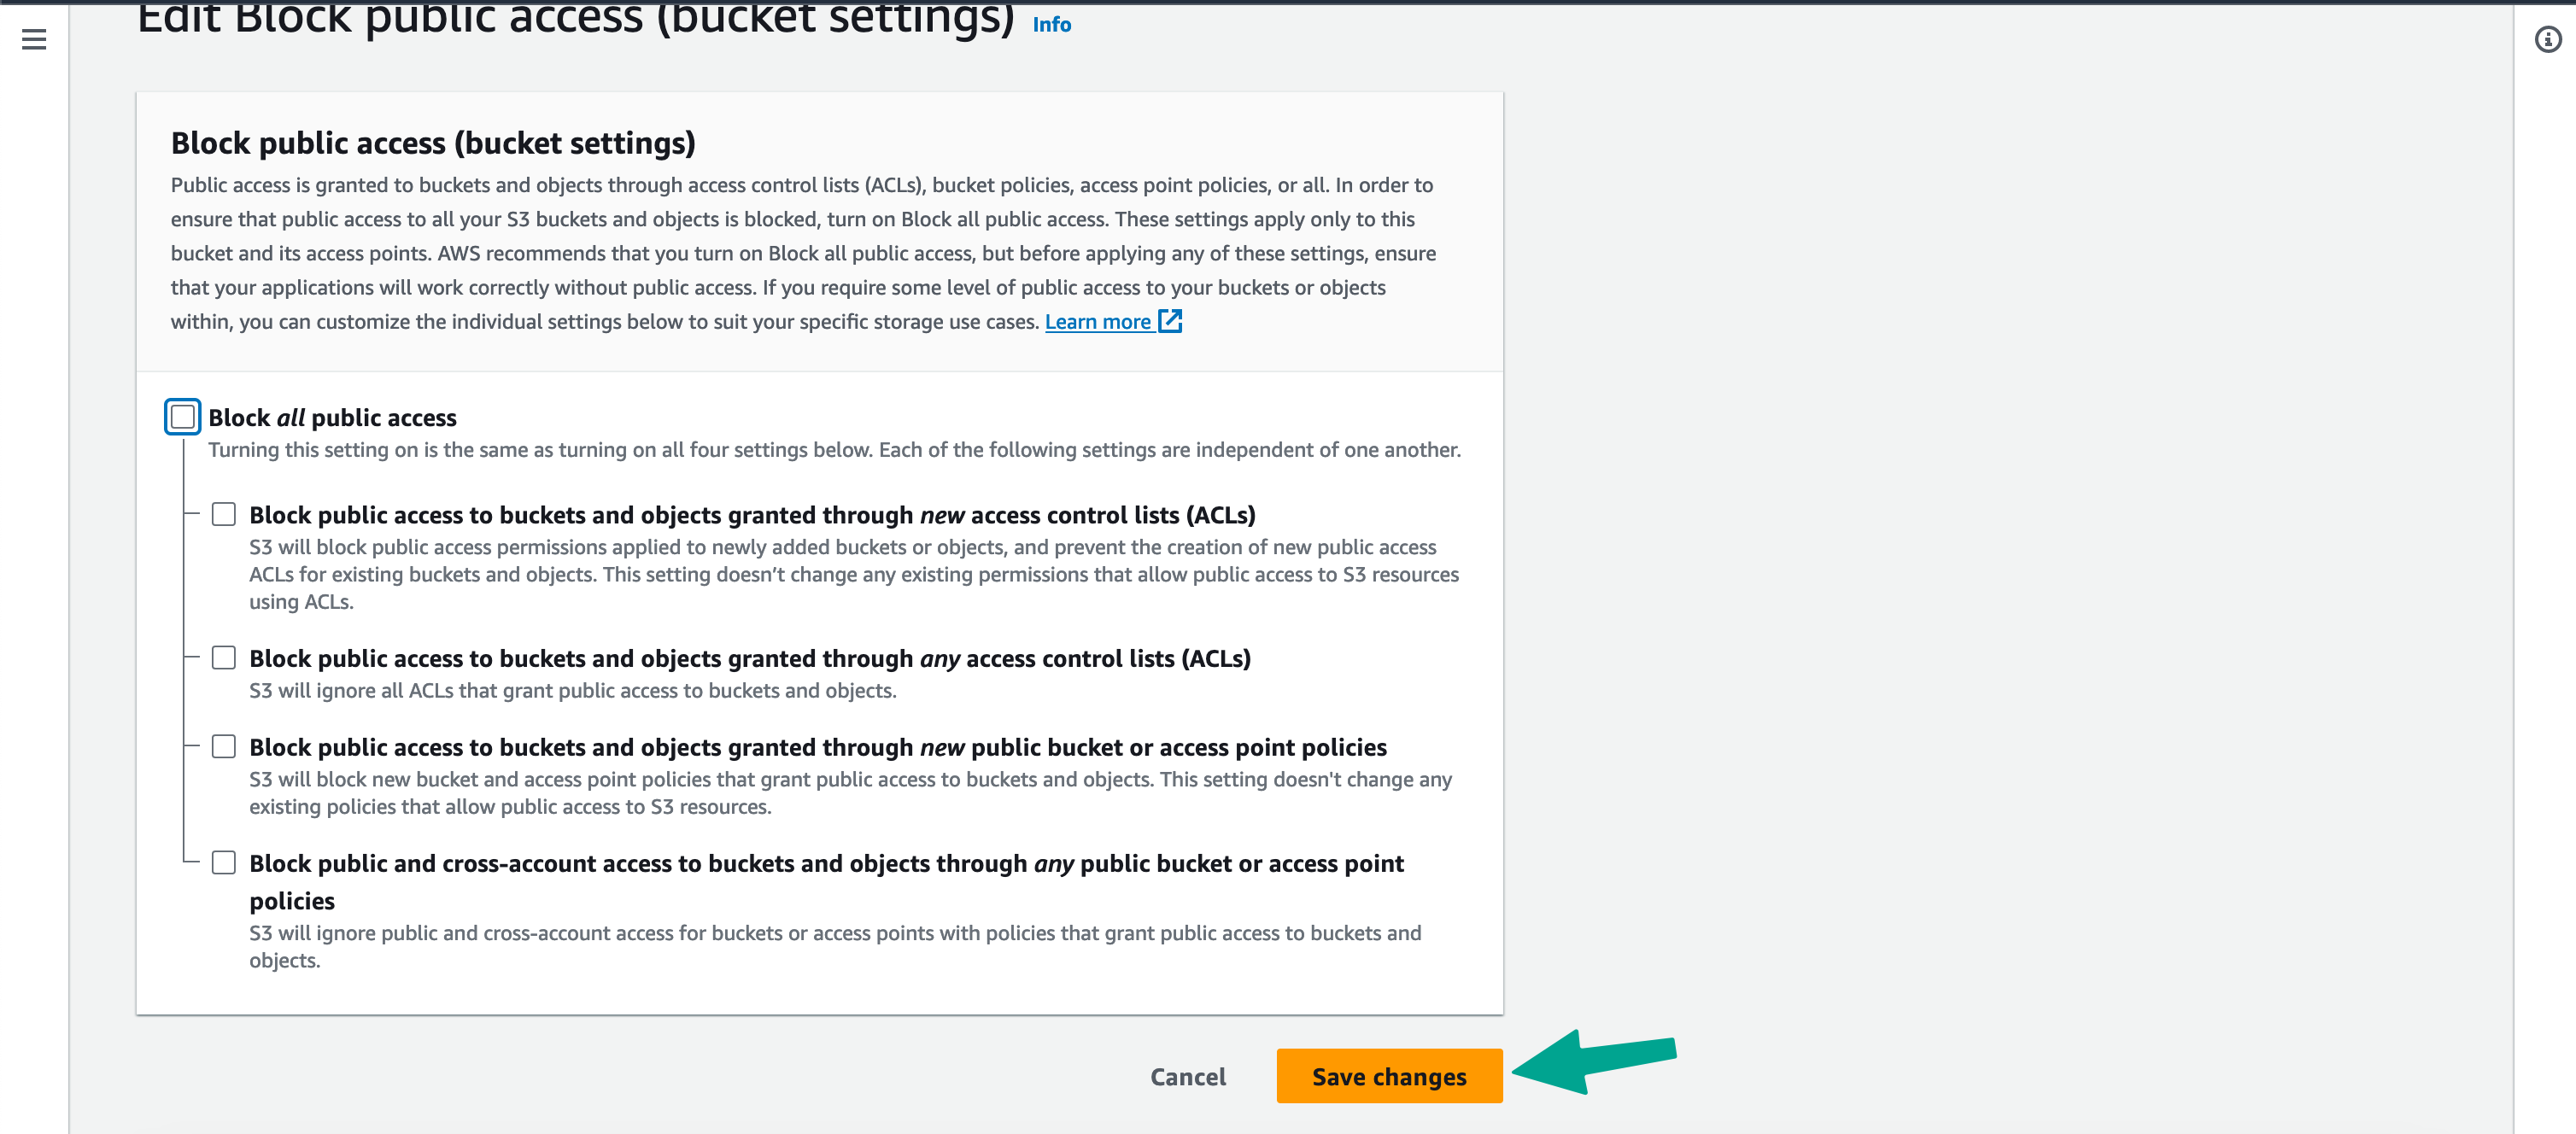
Step 3: Upload your static site content
Create index.html page and add the following content.
<!DOCTYPE html>
<html lang="en">
  <head>
    <meta charset="UTF-8" />
    <meta name="viewport" content="width=device-width, initial-scale=1.0" />
    <title>Buy Soundbar</title>
  </head>
  <body>
    <h1>Welcome to Buy Soundbar</h1>
  </body>
</html>
Select your bucket in AWS S3.
Click on
Upload. In the next screen, selectAdd filesto add file.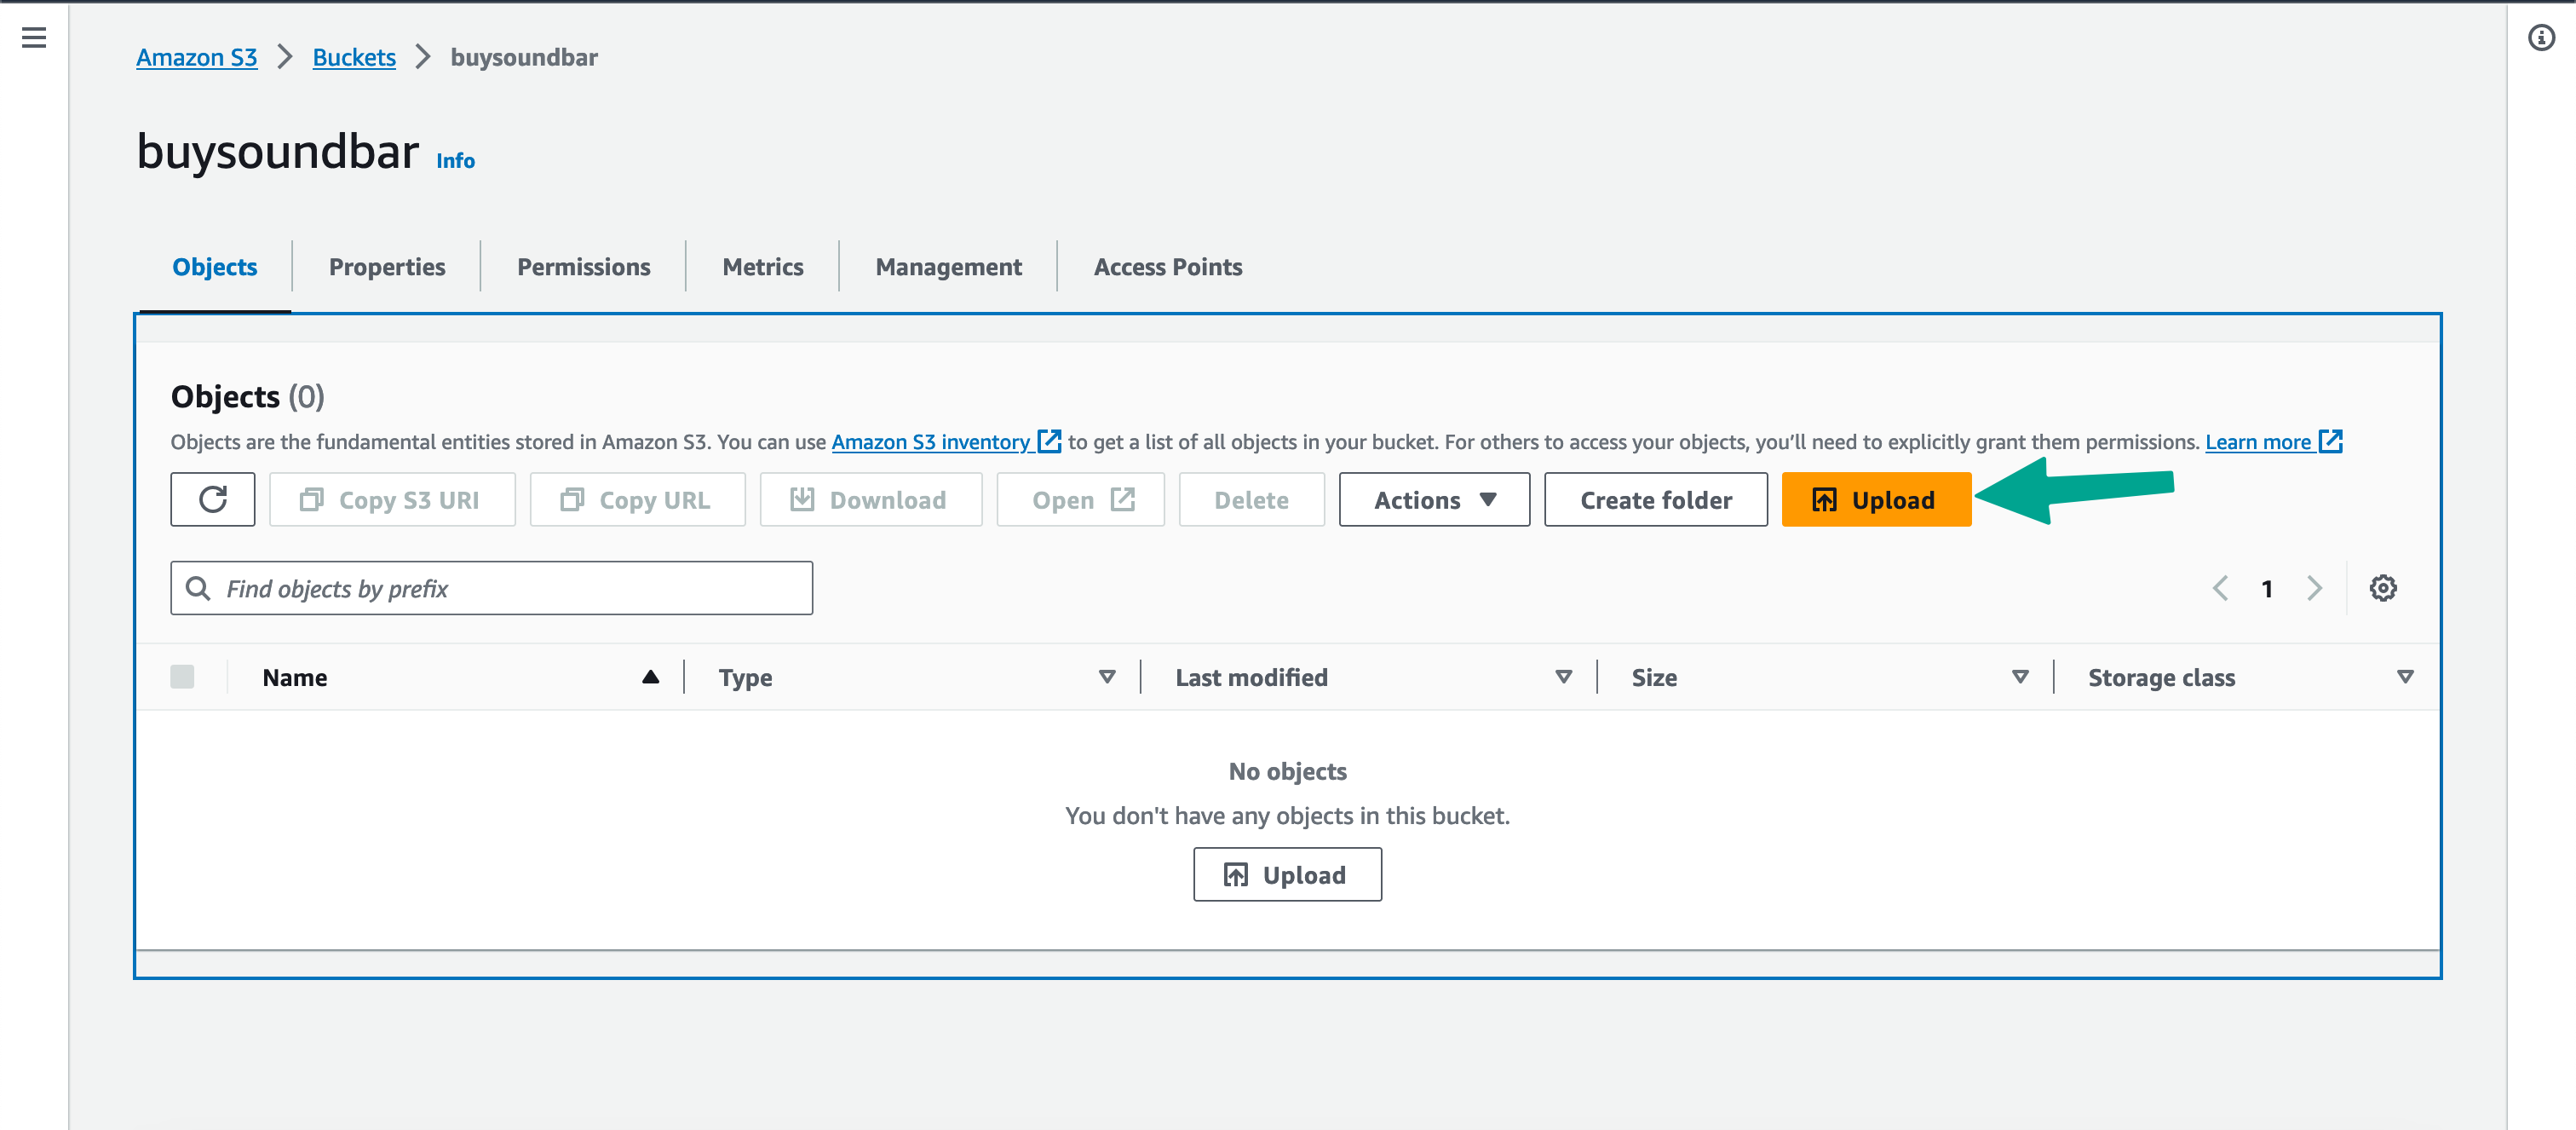

Select the file to upload. I have selected the
index.htmlfile from my device to upload it. Once the file is selected, click onUploadthe button from the bottom of the page.

Step 4: Making objects public using bucket policy.
All the objects present in the bucket should be public for any static website. To make the objects public, we will be using the bucket policy.
Select your bucket.
Select
Permissionsthe tab for the bucket.Move to the
Bucket policyblock and click onEdit.
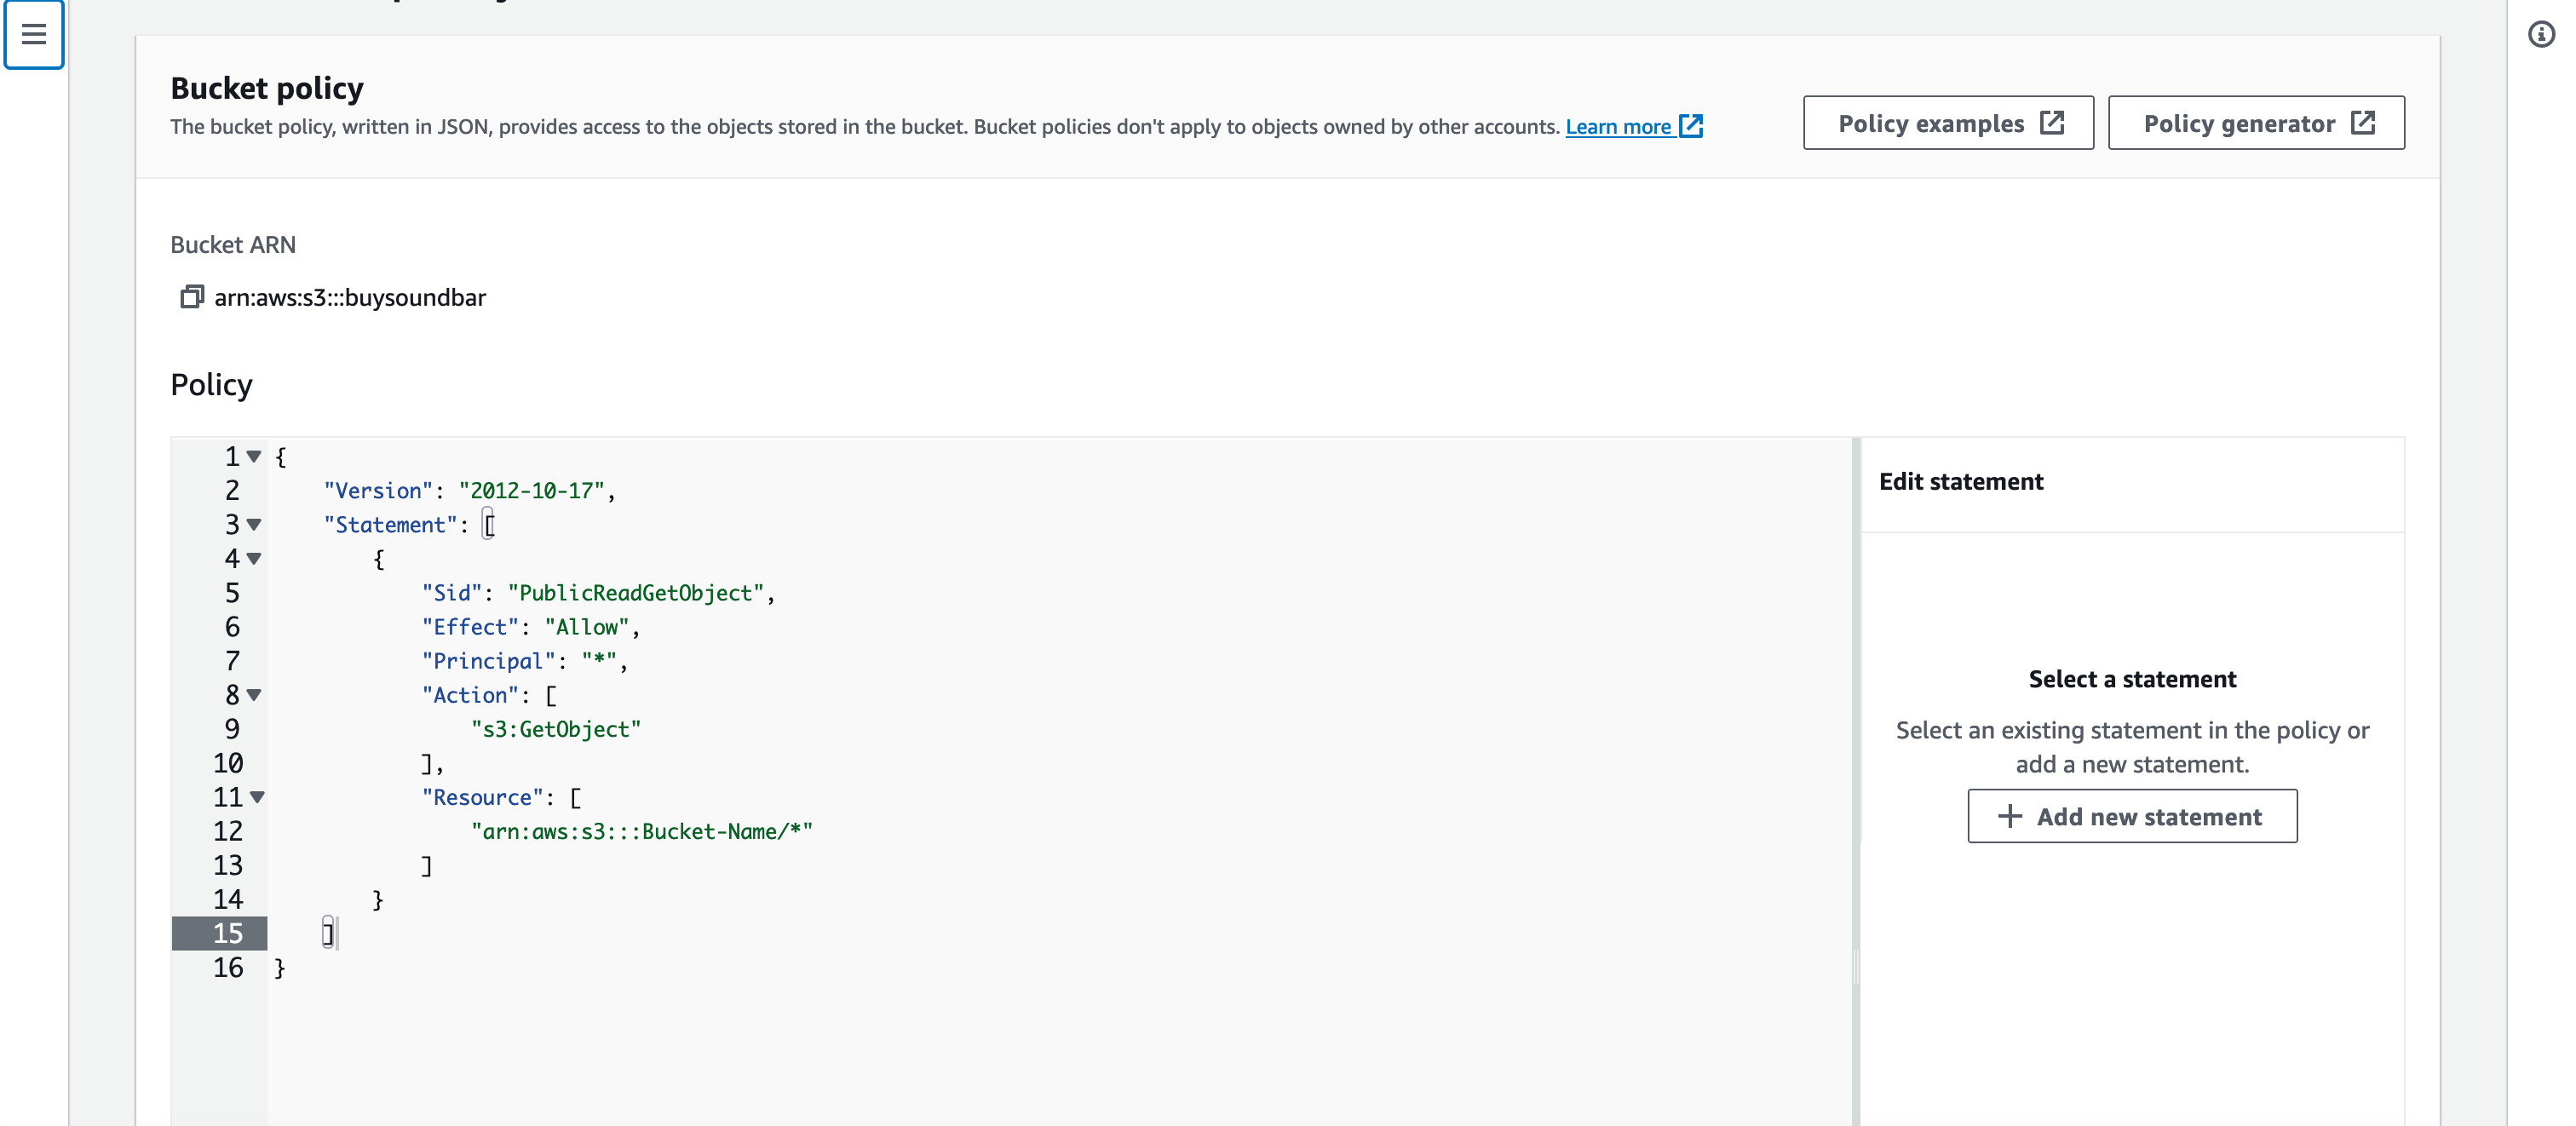
Paste the following policy in the editor.
 {
     "Version": "2012-10-17",
     "Statement": [
         {
             "Sid": "PublicReadGetObject",
             "Effect": "Allow",
             "Principal": "*",
             "Action": [
                 "s3:GetObject"
             ],
             "Resource": [
                 "arn:aws:s3:::Bucket-Name/*"
             ]
         }
     ]
 }
Your editor should look like this:
Replace Bucket-Name with your bucket name. The final version should look like this:
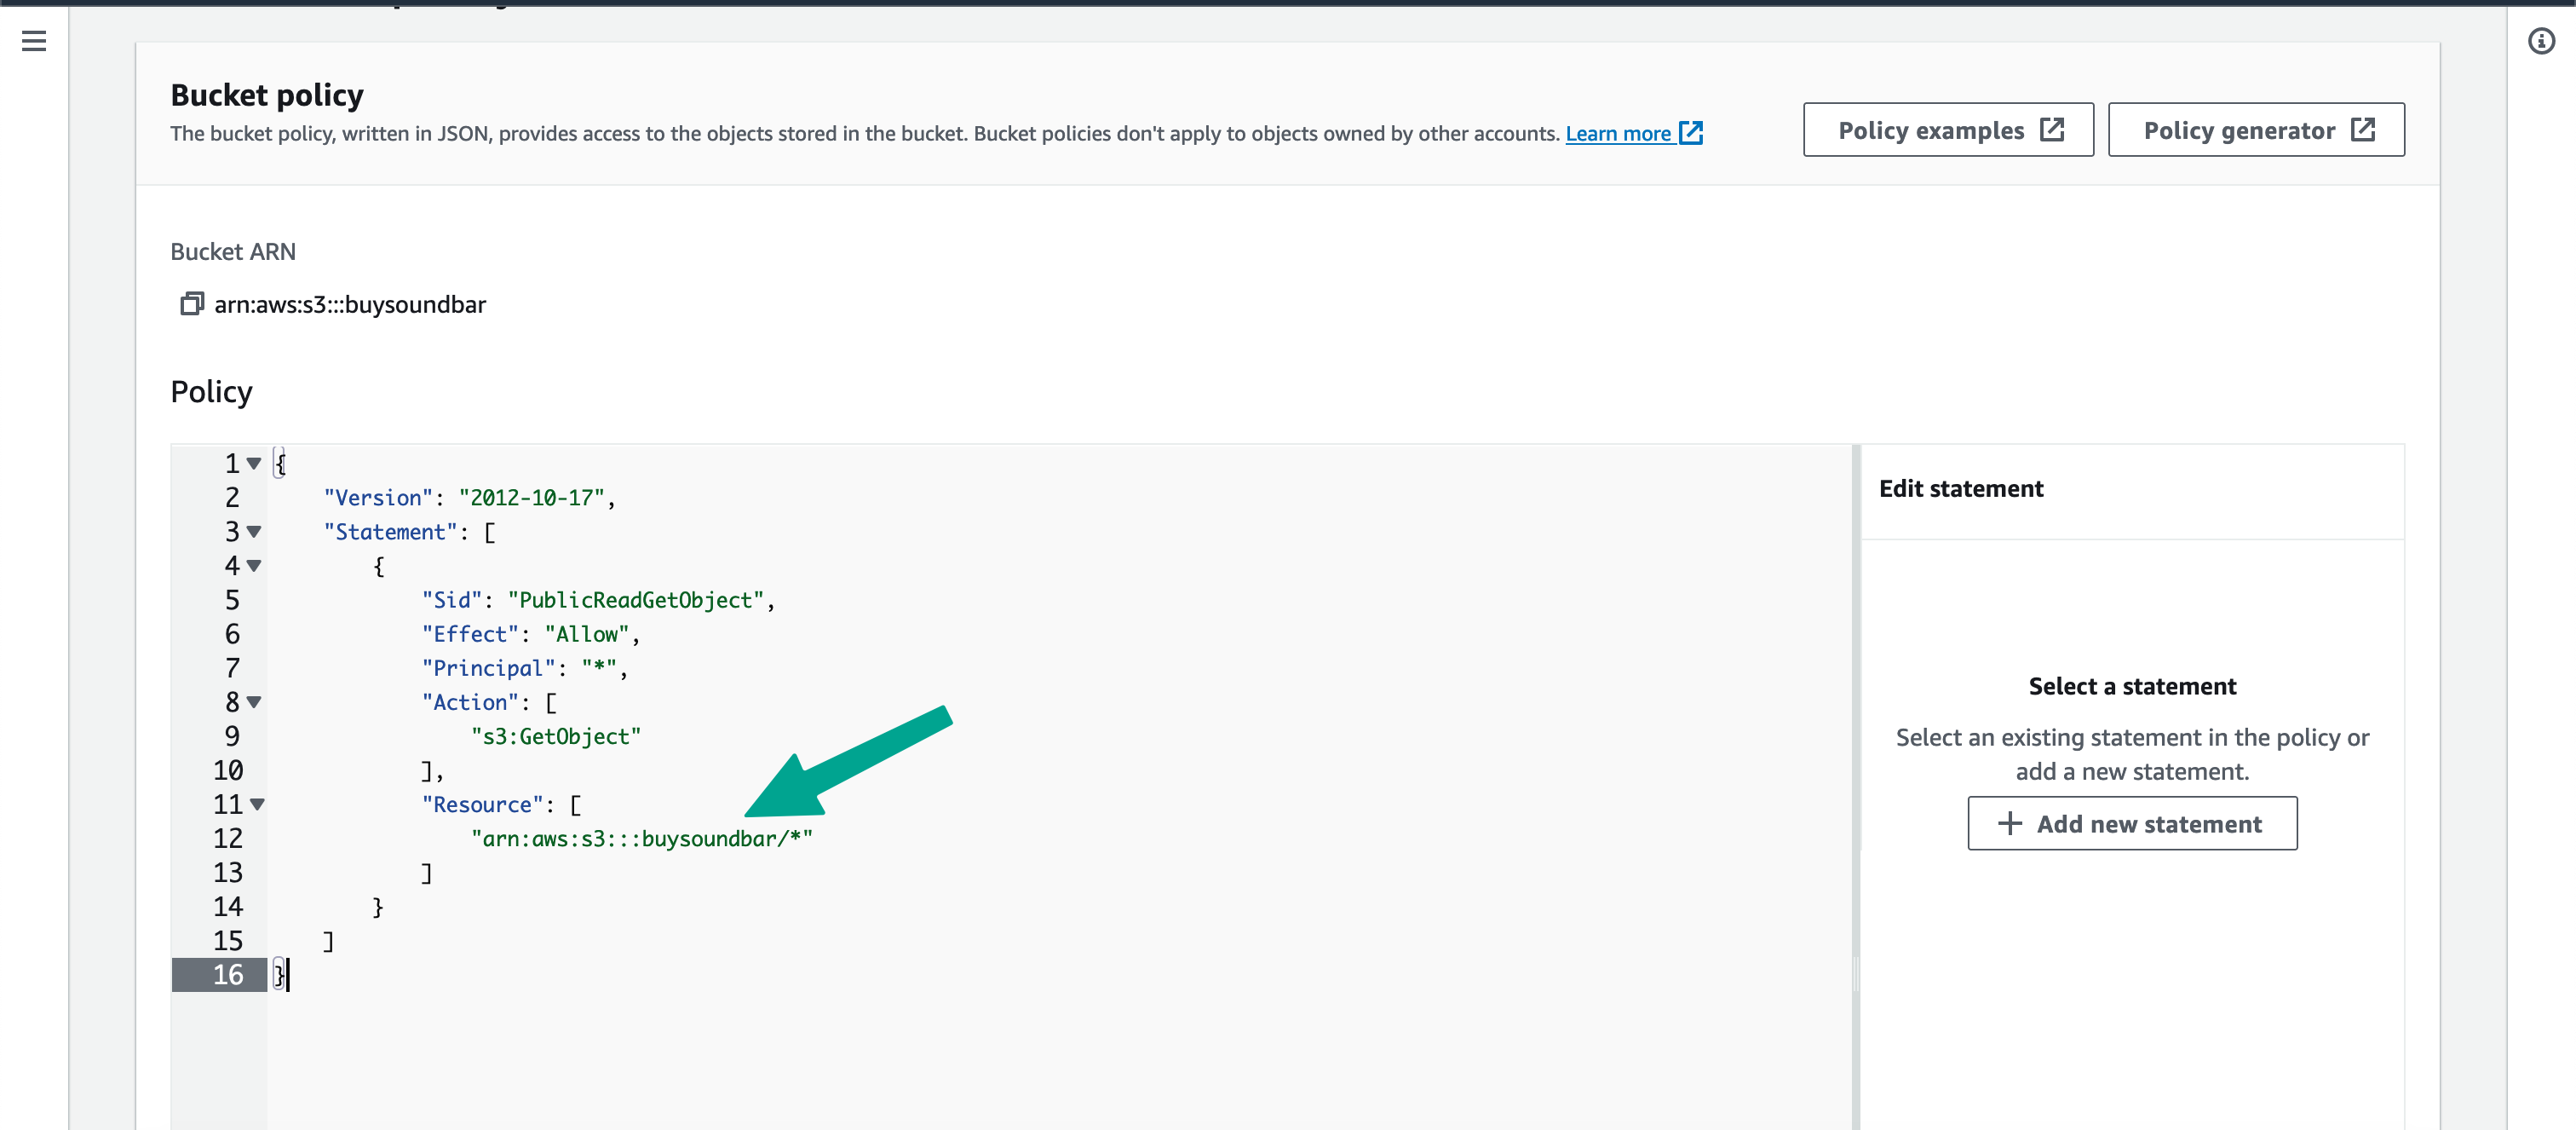
Click on Save Changes to save the policy.
Step 5: Enabling Static website hosting for the bucket
Select your bucket
Click on
Propertiestab. Move to the bottom of the Properties tab.
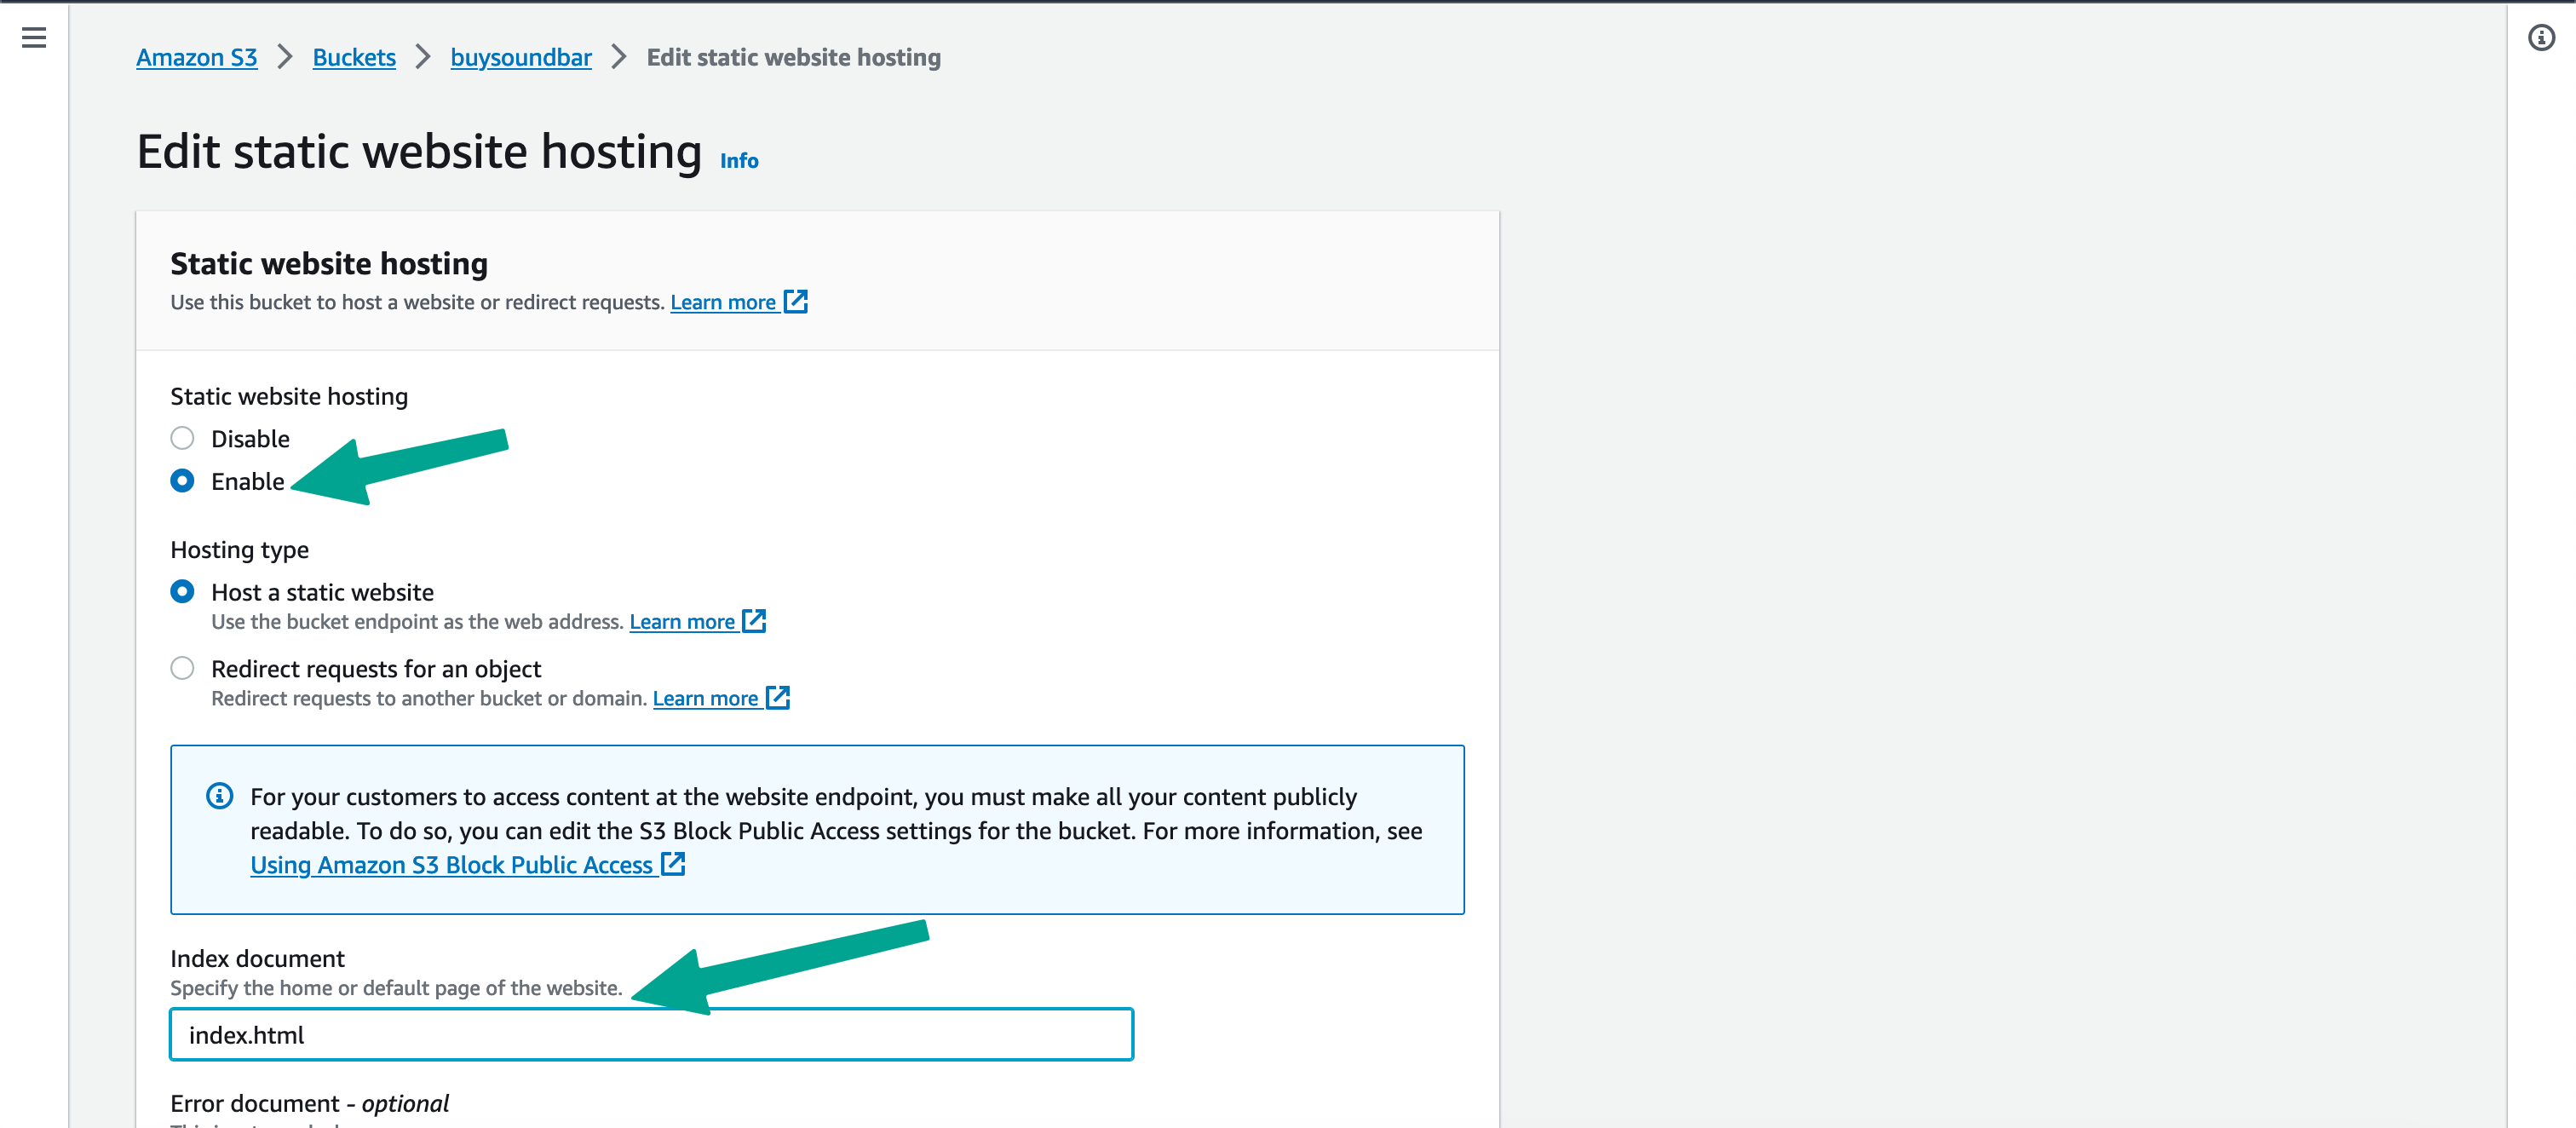
By default, static website hosting is disabled. Click on
Edit.Select
Enabletoggle for Static website hosting in the Edit page.Add
index.htmlin the Index document and click onSave changes.
- After saving, move to the bottom of the
Propertiestab in theStatic website hostingsection. You will find the URL for your static site.

- Open the link in the new tab and you will see your static website which is hosted in AWS S3.
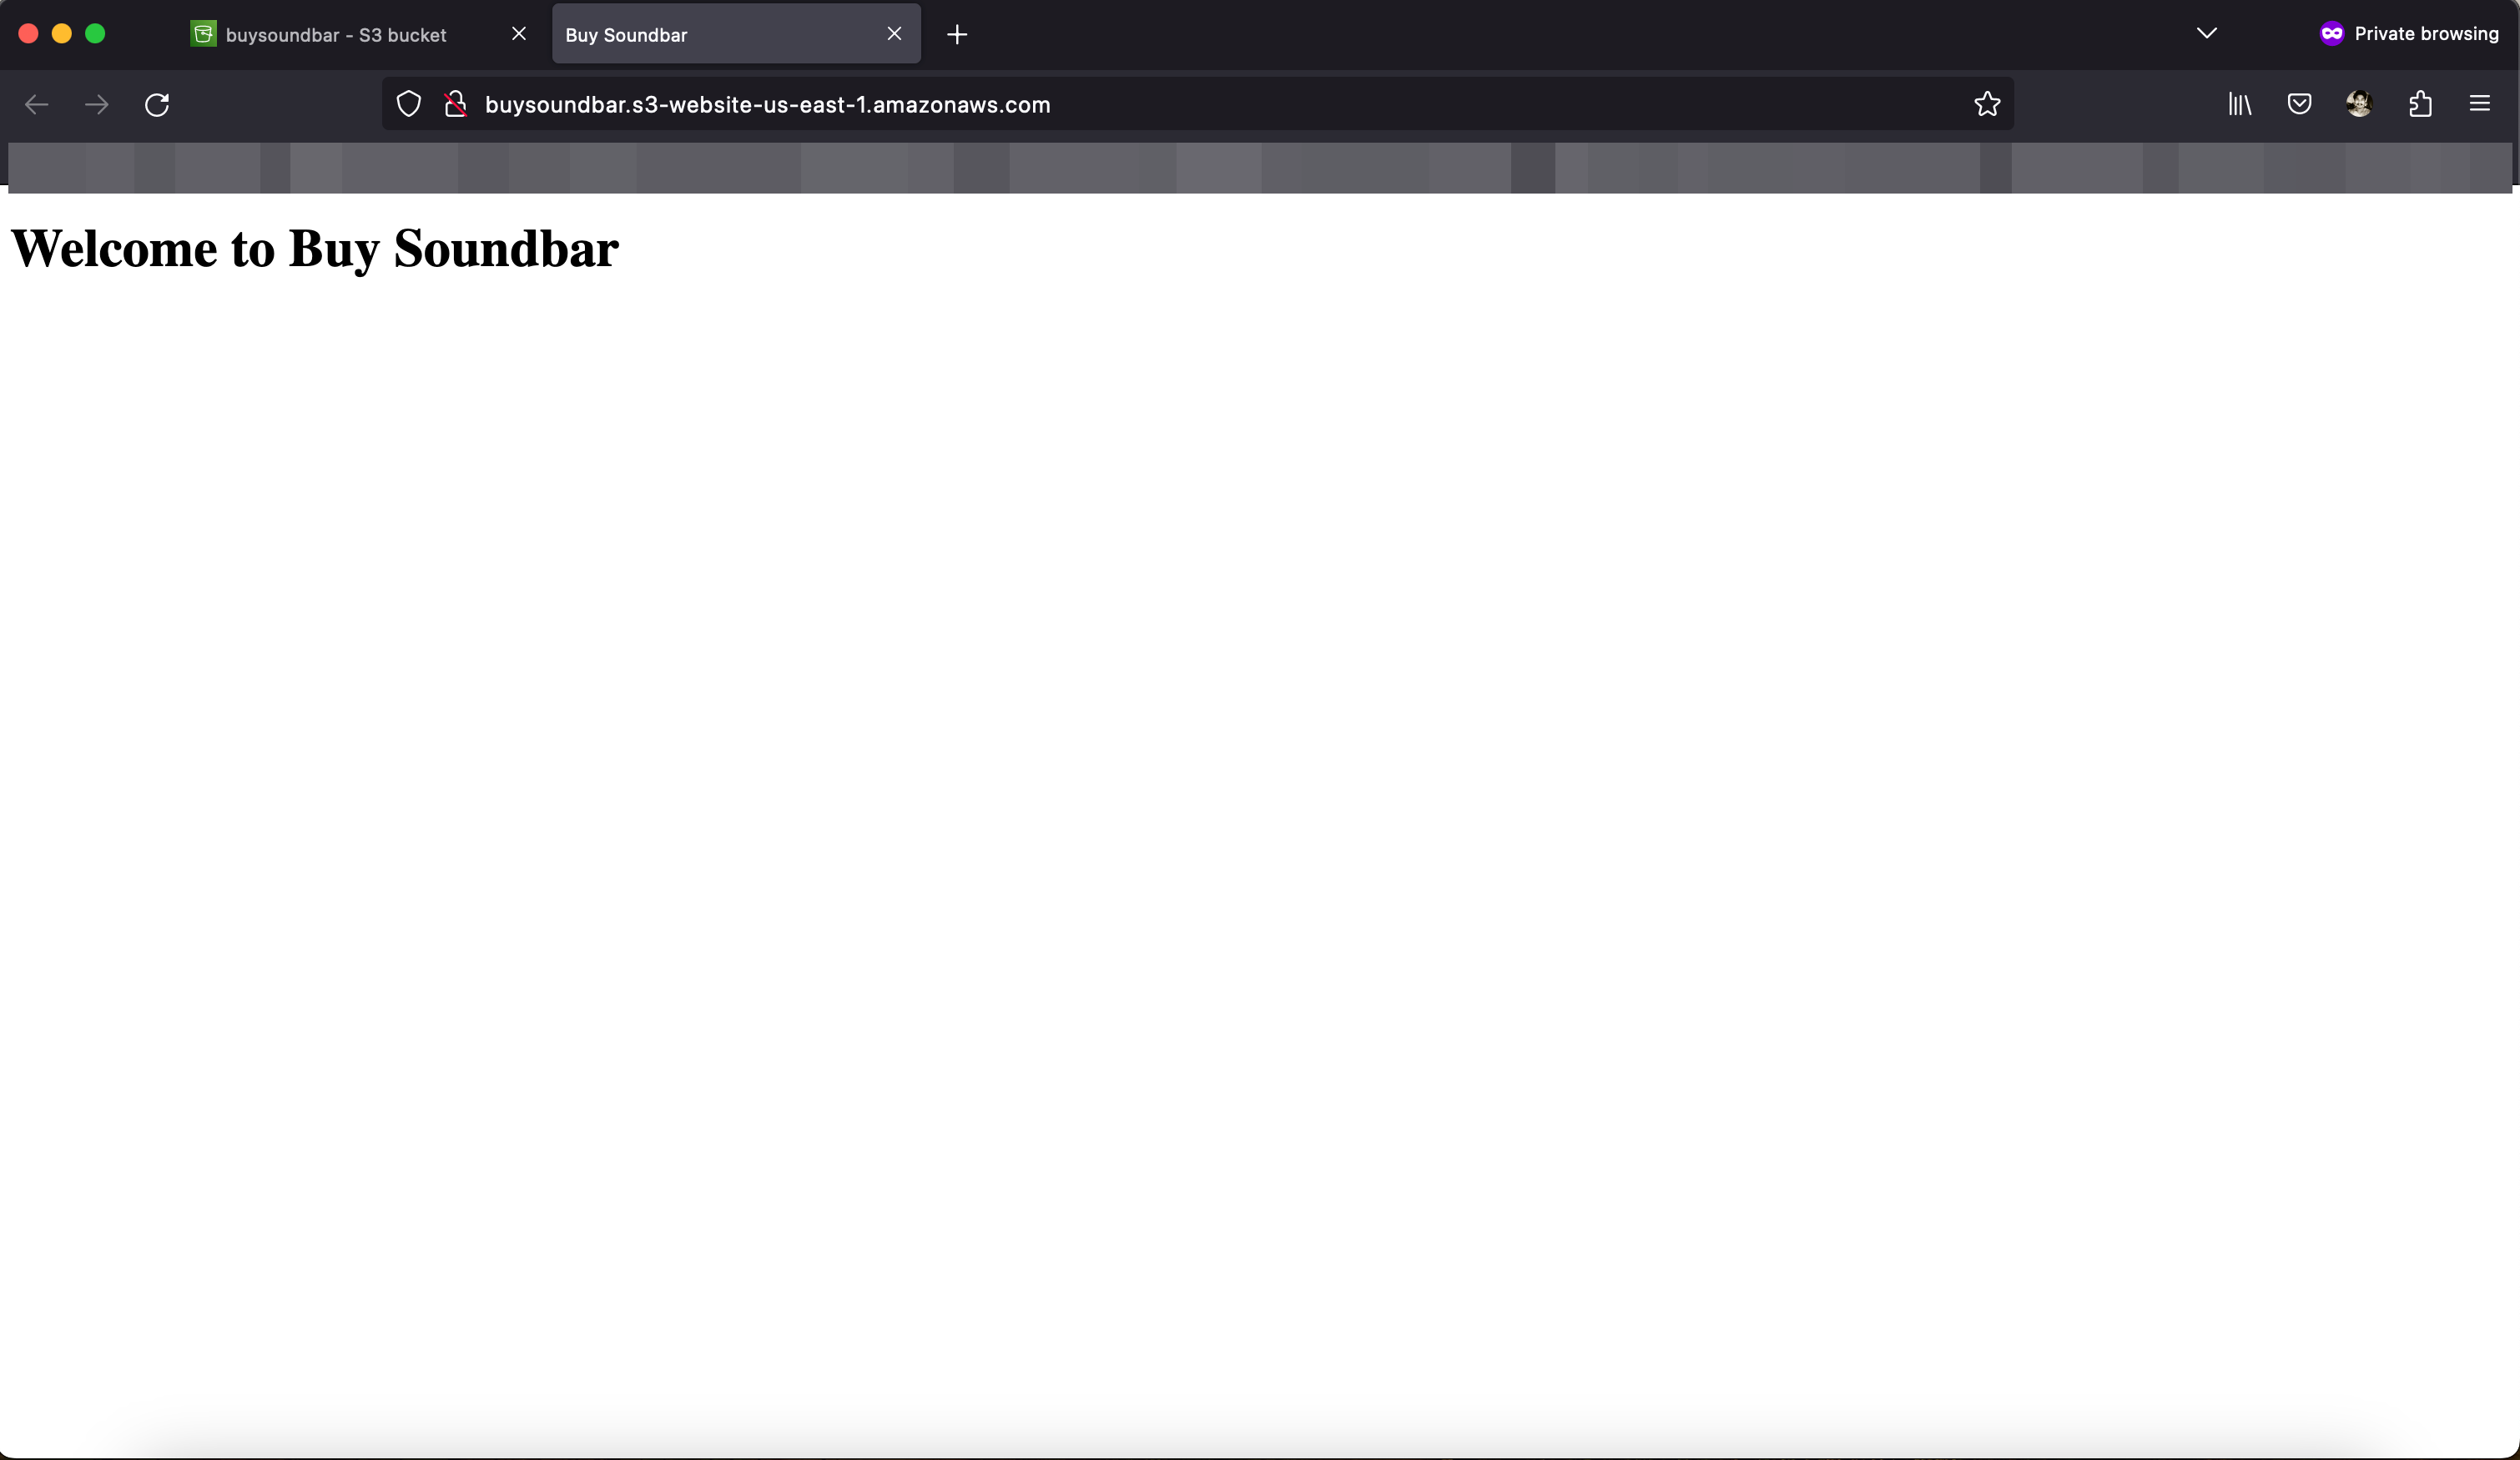
Congratulations 🎉. You have successfully hosted your static website using AWS S3.
What's next?
Static website hosting with AWS S3 and CI/CD with Github Action.